A well-thought-out project setup not only facilitates team collaboration but also lays the foundation for sustainable development. In this post, I'll share best practices and tools that can help you set up a modern Angular project solidly from the start: from linting, modularization, and visualization to commit conventions and monorepo strategies.
Linting: Trust is Good, Control is Better
The linter eslint is the hub for automated source code checking. When you first run ng lint, the CLI sets it up with a default configuration. This includes checking against common TypeScript and Angular best practices.
For the sake of simplicity, I'll use this default configuration without adapting it to any preferences. For me, it's less about the specific conventions, but rather about using certain conventions consistently and consistently. Sticking to the default saves both time and unnecessary discussions.
An exception to this is the eslint rule @typescript-eslint/no-unused-vars, which prohibits unused variables. While this makes sense in general, there are cases where certain parameters are not yet used, but are already prepared or even enforced by an interface. For such cases, I use the following setting in eslint.config.js at the root of the project, which allows unused parameters as long as they begin with an underscore:
"@typescript-eslint/no-unused-vars": [
  "error",
  {
    argsIgnorePattern: "^_",
  },
],
This makes the linter accepting the following, even if the method does not (yet) use the parameter countryCode:
applyVAT(netPrice: number, _countryCode: string): number {
  return netPrice * 1.2;
}
Modularization: Good Fences Make Good Neighbors
To ensure the application can grow over the long term while remaining maintainable, we need good modularization. Especially for enterprise solutions, a division into business domains that know as little about each other as possible has proven effective. This results in low coupling, which favors the separate development of each domain. Separating these domains into layers brings additional structure:

Here are the shown layers that are proposed by Nx:
- feature: Concrete components that implement use cases. These are also referred to as Smart Components.
- ui: Reusable components that are picked up by Smart Components. These are also called Dumb or Presentational Components.
- data: Contains the data model or domain model as well as services for data access
- util: General auxiliary constructs, e.g., for authentication or logging
The four layers used here are a good starting point for most projects. However, depending on preferences and requirements, it may be appropriate to add more. For example, some teams split the data layer into a layer containing the domain model and another layer containing data access. While Dumb Components are granted access to the former, they are denied access to the latter.
In addition, for large projects, it may be useful to further subdivide the shared area.
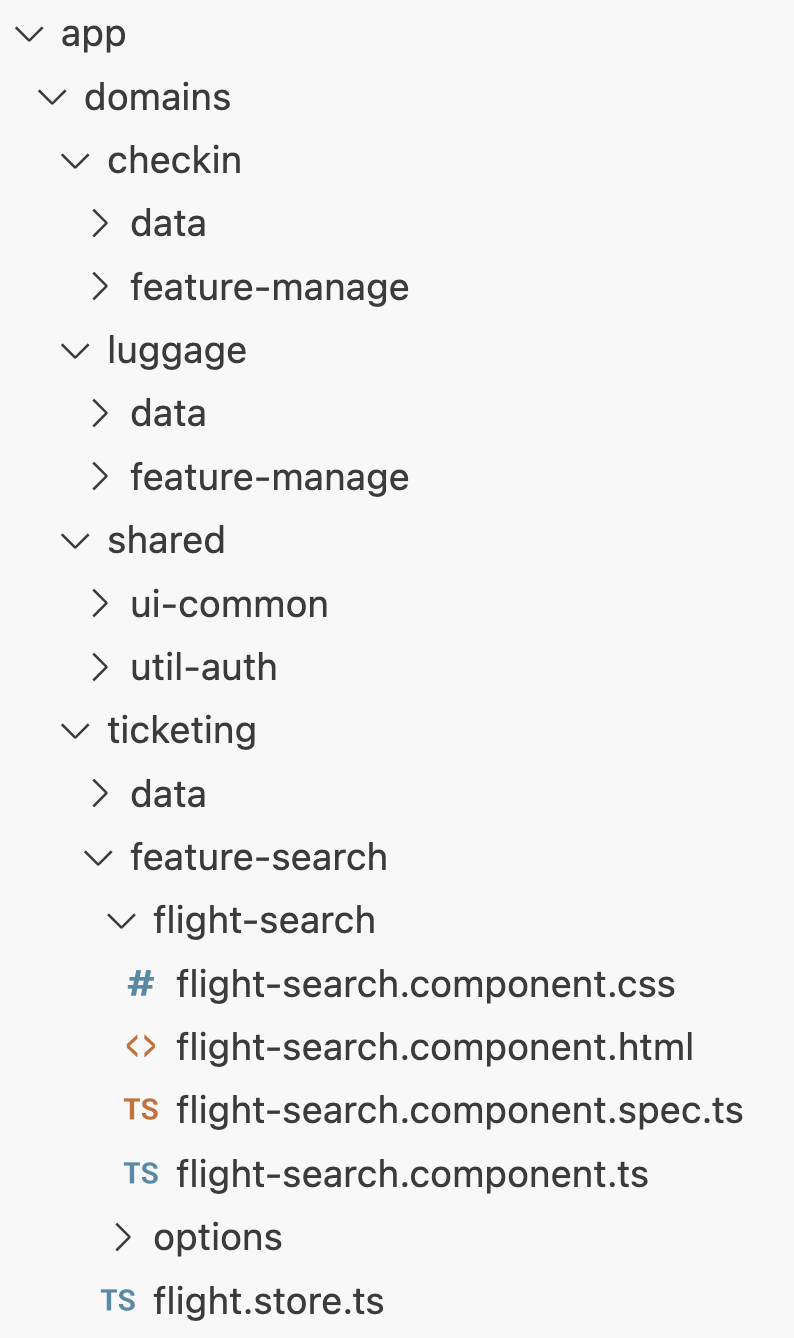
The matrix shown above can be directly translated into the project's folder structure. The columns become folders, and the rows become subfolders:
To simplify relative imports between individual areas, it's a good idea to create path mappings for each domain. This can be done in the project root's tsconfig.json:
"baseUrl": ".",
"paths": {
  "@my-project/*": ["src/app/domains/*"]
}
The result is uniform imports that always follow the pattern project/domain/module/path-to-file:
import { CheckinService } from '@my-project/checkin/data/checkin.service';Sheriff: Verify Modularization
The modularization introduced in the last section has several advantages. First, it avoids discussions about where certain elements should be found or placed. This is especially important in large projects with many team members. Second, it steers development by specifying that a layer may only use subordinate layers and that a domain only has access to its own elements and those from shared resources.
Such rules can be enforced with linting. A suitable linting rule is provided by the Sheriff project. Sheriff and the eslint rule based on it can be installed as follows:
npm install -D @softarc/sheriff-core @softarc/eslint-plugin-sheriffThe file sheriff.config.ts in the root of the project is created using the command npx sheriff init. To this file, we add the respective access rules:
import { sameTag, SheriffConfig } from '@softarc/sheriff-core';

export const config: SheriffConfig = {
  enableBarrelLess: true,
  modules: {
    'src/app/domains/<domain>/feature-<name>': [
      'domain:<domain>',
      'type:feature',
    ],
    'src/app/domains/<domain>/ui-<name>': ['domain:<domain>', 'type:ui'],
    'src/app/domains/<domain>/data': ['domain:<domain>', 'type:data'],
    'src/app/domains/<domain>/util-<name>': ['domain:<domain>', 'type:util'],
  },
  depRules: {
    root: '*',
    'domain:*': [sameTag, 'domain:shared'],
    'type:feature': ['type:ui', 'type:data', 'type:util'],
    'type:ui': ['type:data', 'type:util'],
    'type:data': ['type:util'],
    'type:util': [],
  },
};
The modules section divides the project into modules, and depRules defines the permitted access between these modules. Angle brackets define placeholders. For example, <domain> corresponds to the names of the individual folders under src/app/domains. The configuration shown assigns two tags to each module. The one beginning with domain corresponds to the columns of our architecture matrix; those beginning with feature reflect the rows.
After evaluating the placeholders, the module src/app/domains/booking/feature-manage receives the tags domain:booking and type:feature, for example. The access rules under depRules are based on these tags. The example shown defines that a domain only has access to itself and to shared. However, it also defines that each layer may only communicate with layers below it. Therefore, a module from the feature layer may only access modules from the ui, data, and util layers.
Apart from the permitted access defined by the depRules node, Sheriff divides each module into a public and a private part. Other modules can access the public part, provided the depRules allow it. The private part, however, is an implementation detail of the module and is not visible outside. These implementation details can thus be (easily) subsequently changed without affecting the module's consumers.
Originally, each module had to expose its public API via an index.ts file. Naming conventions for private components can now be specified. To do this, as shown in the example, enableBarrelLess is set to true. This causes Sheriff to treat everything in the internal subfolder as private. However, the name of this folder is configurable, and future versions of Sheriff will even allow globs or regular expressions to identify private files. This way, the application could specify that, for example, all files whose names begin with a certain character or are located in certain folders or folder levels are private.
In order for eslint to delegate to Sheriff, a corresponding entry is required in the eslint.config.js in the project root:
const eslint = require("@eslint/js");
const tseslint = require("typescript-eslint");
const sheriff = require("@softarc/eslint-plugin-sheriff");

[…]

module.exports = tseslint.config(
  […],
  {
    files: ["**/*.ts"],
    extends: [sheriff.configs.all],
  },
);
If the specified rules are violated, the linter in the IDE of your choice will return an error message:

Here, the ticketing domain accesses the checkin domain directly, and it references the private API of util-auth.
When creating rules, it can be useful to find out which modules Sheriff sets up and tags them. The Sheriff CLI provides this information. To do so, in the project root, use the following command:
npx sheriff list src/main.ts
A Case for Two: Visualizing and Analyzing Architecture with Detective
The Detective tool visualizes the structure monitored by Sheriff in a dependency graph:
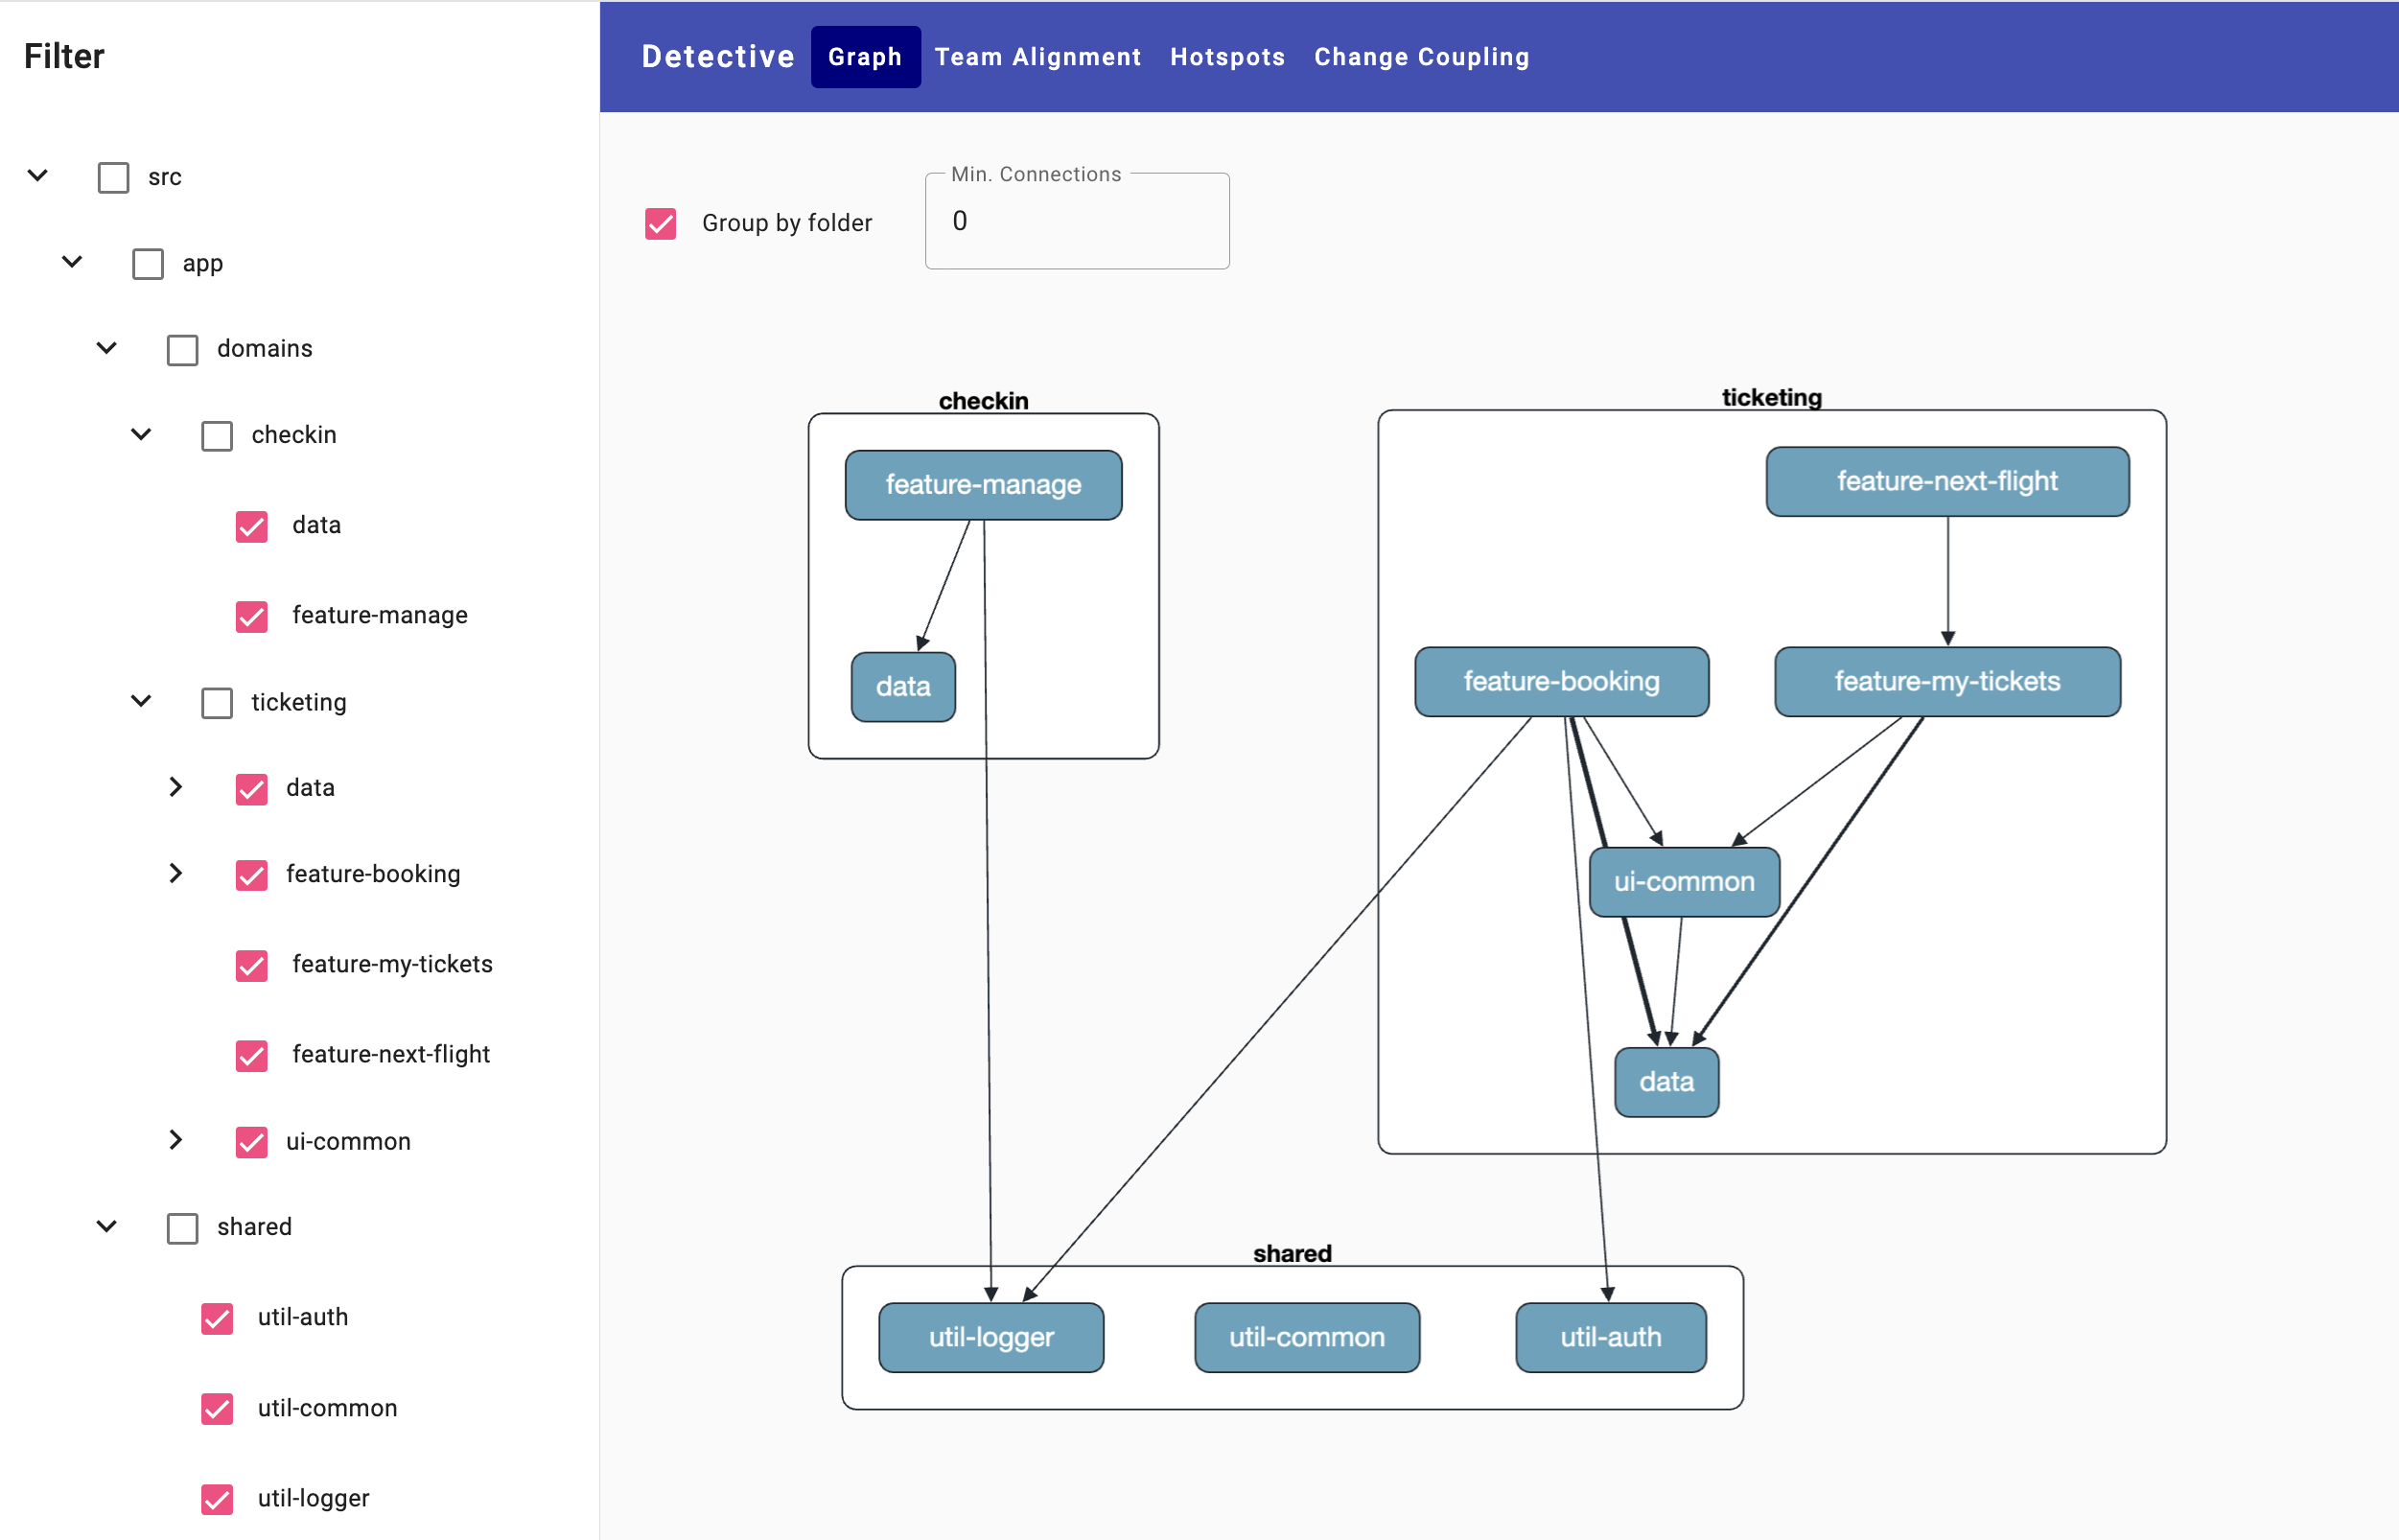
It can be installed into existing projects using npm and started using npx:
npm i @softarc/detective -D
npx detective
In addition to visualizing dependencies, it also offers additional forensic analyses, which also include information from the Git history:
- Change coupling reveals which modules were changed together and how often, thus providing an indicator of hidden coupling.
- Hot spots are areas of code that have been changed frequently and are highly complex. Studies show that affected files are often noticeably more difficult to maintain.
- Team alignment examines how well teams are aligned with individual modules, such as domains. To do this, Git users are mapped to team names in advance. Ideally, each team has responsibility for one or a small number of domains.
Please find more information on forensic analysis and detective here.
More on this: Angular Architecture Workshop (Remote, Interactive, Advanced)
Become an expert for enterprise-scale and maintainable Angular applications with our Angular Architecture workshop!
English Version | German Version
Prettier, Because the Eye Eats First
If different people maintain the same application, different programming styles may be used. Tools like Prettier, which automatically format the source code, ensure consistency. Since consistency rather than a specific style is the priority here, I'll stick with the default settings for simplicity.
However, I find the Prettier plugin prettier-plugin-organize-imports quite useful as automatically sorting imports helps to get a quick overview and prevents for merge conflicts. You just need to install it as a dev dependency and Prettier will automatically pick it up:
npm i -D prettier-plugin-organize-importsPrettier automatically picks up the settings defined in the .editorconfig generated by the Angular CLI. For this reason, it is, for instance, automatically configured for using single quotes for Strings as usual in the Angular world.
To limit the formatting to just the files that have just been changed before committing for performance reasons, the pretty-quick package is recommended:
npm i pretty-quickAfter installation, prettier can be started via
npx pretty-quickBelow I will show how these and other instructions can be triggered automatically with every commit.
Conventional Commits
Everyone wants to know about changes and new features, but no one enjoys writing a changelog. Moreover, manual changelogs run the risk of missing some details.
If you value good commit messages, these can already be as valuable as a changelog for internal use. And the best part: You need commit messages anyway, so the additional effort is limited. For external consumers, you can even derive a nicely formatted changelog from them.
Conventional commits have proven to be a useful tool for structuring such commit messages. Here is the basic structure of such a message:
<type>[optional scope]: <description>;

[optional body]

[optional footer(s)]
Only the first line is mandatory. The type describes the type of change (e.g., feat for feature, fix for bug fix, docs for documentation, refactor for refactoring, or chore for general work on the repo). The optional scope specifies which subproject, e.g., which domain, the change refers to.
The optional body describes the changes made in more detail. The "before ..., now ..." format has proven useful for modifications. This allows you to clearly express which existing behavior has been changed and how. The footer, which is also optional, can contain references, such as the Git usernames of reviewers or people who participated in pair programming. You can also refer to other tickets here:
feat(booking): allow to book flights for groups

Before, one could only book a flight for oneself.
Now, one can also book for an entire group of people.

Together with: Max Muster

Closes: #56789
Commit Linting
To ensure everyone adheres to conventional commits, linting commit messages is a good option. The packages from the commitlint project make this possible. To do so, first install the packages via npm:
npm install -D @commitlint/{cli,config-conventional}Commit linting can then be configured with a file commitlint.config.mjs in your project's root so that the rules of conventional commits are used:
export default {
  extends: ["@commitlint/config-conventional"]
};
A Git hook is used to automatically check all messages submitted to git commit. The next section describes how this is accomplished using the npm package Husky.
Husky: The Watchdog for Commits
Hooks allow you to define custom scripts, which Git executes at specific times such as before each commit. The popular npm package Husky makes using these hooks very easy. After installation, Husky can be configured with the husky init command:
npm install husky -D
npx husky init
The individual scripts must now be set up in the .husky folder in the project root. The names of the script files determine when Husky calls the script. The pre-commit file, for example, is used before every commit. If an error occurs in the script, Git aborts the commit process. In my case, it triggers the linter and thus Sheriff, and delegates the source code formatting to pretty-quick:
ng lint
npx pretty-quick --staged
The commit-msg script, on the other hand, can be used to validate the commit message. Here, I delegate to commit linting:
npx --no -- commitlint --edit $1Since Husky passes the captured commit message as a parameter, it can be referenced in the script via $1. A violation of conventional commits will now be warned accordingly:

Testing Library for Angular
The Angular CLI provides everything needed for unit and component testing out of the box. However, writing component tests that simulate user interactions directly is very tedious, partly because the test case itself has to take care of triggering change detection.
The testing library for Angular Testing Lib solves this problem. It provides a convenient wrapper that hides low-level details of Angular's testing story. The next example shows a component test implemented with it, which simulates user input and a button click and then checks whether the component presents the desired result:
import { TestBed } from '@angular/core/testing';
import { render, screen } from '@testing-library/angular';
import userEvent from '@testing-library/user-event';

import { FlightSearchComponent } from './flight-search.component';
import { provideHttpClient } from '@angular/common/http';
import {
  HttpTestingController,
  provideHttpClientTesting,
} from '@angular/common/http/testing';

describe('FlightSearchComponent', () => {
  let ctrl: HttpTestingController;

  it('should search for flights', async () => {
    const user = userEvent.setup();

    await render(FlightSearchComponent, {
      providers: [provideHttpClient(), provideHttpClientTesting()],
    });

    const fromField = await screen.findByPlaceholderText('from');
    const toField = await screen.findByPlaceholderText('to');
    const loadButton = await screen.findByText('Load');

    await user.type(fromField, 'Graz');
    await user.type(toField, 'Hamburg');
    await user.click(loadButton);

    ctrl = TestBed.inject(HttpTestingController);
    const request = ctrl.expectOne(
      'http://demo.angulararchitects.io/api/flight?from=Graz&to=Hamburg',
    );

    const date = new Date().toISOString();
    request.flush([
      { id: 7, from: 'Graz', to: 'Hamburg', date, delayed: false },
    ]);

    const result = await screen.findByText(/Graz/);
    expect(result).not.toBeNull();
  });
});
Since the testing library is built directly on top of Angular's TestBed, dependencies can be exchanged in the usual way. The example shown uses this option to mock data access with the HttpClient.
Below, when introducing Nx, we will also get the famous E2E framework Playwright.
Monorepo With Apps and Libs
One scaling strategy for large solutions is to distribute the individual domains across different applications. In this case, individual teams can work on one application at a time and only need to rebuild the application that has just been changed, which speeds up the build process.
If a team decides to adopt this approach, the question arises whether to manage the applications in one or multiple code repositories. Using a single repository—also known as a monorepo—makes it easier to avoid version conflicts, eliminates the need to distribute shared libraries, and immediately detects breaking changes. Managing applications in multiple repositories, on the other hand, provides more freedom for individual teams.
To build monorepos, the Angular CLI gives us the ability to create multiple applications and libraries within one Angular workspace:
ng g app miles
ng g lib util-auth
The CLI generates these subprojects in the projects folder. The main project, which ng new creates by default, is located in the project root. For consistency, it's a good idea to move this to projects as well. If you move it manually, make sure to update the entries in angular.json accordingly. Alternatively, you can create a new app with ng g app and move the existing source code there.
To avoid generating the default project, ng new can be used with the --create-application false parameter. This creates an empty workspace in which you can create the desired apps using ng g app. This approach bypasses the default project in the project root from the start.
To allow apps to access the libraries, the Angular CLI creates path mappings in the tsconfig.json file that point to the compiled version of the libraries in the dist folder. Unfortunately, this default setting requires the libraries to be built after every change. Therefore, it has become common practice to point the path mappings to the libraries' src folder:
"@my-project/util-auth": [
  "projects/util-auth/src/public-api.ts"
]
The public-api.ts file referenced here is the entry point into the library provided by the CLI. This file exports all constructs belonging to the library's public API. The Nx build system mentioned below creates such mappings by default.
After setting up the path mapping, applications can import the library using the specified name:
import { UtilAuthService } from '@my-project/util-auth';Optional: Micro Frontends with Native Federation
The individual apps into which a system is divided are also called micro frontends. However, the goal is usually to offer users a single, integrated solution. Therefore, the individual micro frontends need to be integrated into a single shell. This can be achieved with the Native Federation project.
Native Federation is a technology-neutral implementation of the ideas of Module Federation. It allows a shell to load components or routes from separately compiled micro frontends. In the world of federation, the shell is referred to as the host, and the micro frontends as remote.
A schematic exists for setting up Native Federation. The instruction
ng g @angular-architects/native-federation:init --project my-remote --type remote --port 4201elevates a project to a micro frontend. With
ng g @angular-architects/native-federation:init --project my-shell --type dynamic-host --port 4200an application is then promoted to a shell. Such a shell also receives a federation-manifest.json file that points to the URLs of the micro frontends. To load a micro frontend, the shell typically receives a lazy route:
{
  path: 'flights',
  loadComponent: () =>
    loadRemoteModule('mfe1', './Component').then((m) => m.AppComponent),
},
For more details on Native Federation can be found here
Incremental Compilation with Nx
By subdividing a monorepo into different applications, only the changed applications and libraries need to be rebuilt, tested, and linted. This saves a lot of time, provided you know which apps and libraries are affected by your recent changes. This is where the popular build system Nx comes into play. It is able to identify which projects in the monorepo are affected by changes and allows you to rebuild, test, or lint only those.
It also integrates a host of useful tools that can be easily configured with Schematics. These include Storybook and the popular end-to-end testing framework Playwright.
While there are scripts that convert an existing project into an Nx project, I recommend creating a new Nx workspace and migrating the existing solution there instead. This ensures that the new monorepo is free of legacy issues. To create an Nx workspace, use the following command:
npx create-nx-workspace@latestAdditionally, you should install the Nx CLI:
npm i -g nxIt can be used almost like the Angular CLI. For example, it comes with the usual generate, serve, and build commands:
nx g app apps/milesWhen building applications and libraries, the full path must now be specified. When building an application with
nx build milesNx places the result in a local cache, which it creates in the .nx folder in the project root. If the same application is rebuilt without changes, Nx retrieves the desired result from the cache. This speeds up the process enormously:

This cache works not only for builds, but also for unit tests, end-to-end testing, and linting. Caching of build artifacts often occurs at the entire app level. Caching of test and linting results, on the other hand, occurs at the individual library level. For this reason, it's common practice to break Nx projects into numerous smaller monorepo-internal libraries.
To request building, testing, or linting for multiple projects, the Nx CLI provides the run-many statement:
nx run-many -t build -p flights,milesHere, too, the parts not affected by changes are loaded from the cache. The aspects of Nx discussed so far are free and licensed under the MIT license. The team behind Nx also offers commercial solutions such as the Nx Cloud. This provides a central cache for the entire team. This means that all team members, as well as the build server, benefit from all actions already performed. The following command establishes a connection to the Nx Cloud:
nx connect-to-nx-cloudAfter that, you can test the Nx Cloud for free for a limited time. Free licenses are generally available for open source projects. Those who want to keep the Nx Cloud under their own control can also run it locally as a Docker image.
Another feature of the Nx Cloud is the parallelization of the entire build pipeline. Nx automatically determines which subtasks can be outsourced to separate nodes in the cloud. You only need to specify the maximum number of nodes. To use this feature, you need a corresponding build script that can be configured with the command
nx generate @nx/workspace:ci-workflow --ci=githubIn addition to support for GitHub Actions, CircleCI, Azure DevOps, Bitbucket, and Gitlab are currently supported. After generating the build script, it's worth taking a look at the generated comments. Some features must be explicitly enabled by removing these comments.
Summary
A well-thought-out project setup is the foundation for maintainable, scalable Angular applications. With clear modularization by domains and layers, automated checks using eslint and Sheriff, and consistent formatting with Prettier, a structure is created that is sustainable in the long term. Tools like Detective also help analyze and optimize dependencies and modularization. This setup is complemented by a monorepo with an incremental build process via Nx, commit linting, and Git hooks with Husky.