While tech giants like Google and Facebook rely on monorepos, the reality for many companies is different: Business software is often developed in multiple project- or product-related repos. The relatively new Nx Polygraph takes this into account by visualizing dependencies between repos and enforcing common policies.
In this article, I'll provide an overview of Polygraph and show how to develop a conformance rule that ensures the use of a specific Angular version across all repos. This check is especially essential for Micro Frontend projects, where you want to limit yourself to a single version for simplicity.
Big thanks to Juri Strumpflohner, Sr. Director of Developer Experience for Nx, for reviewing this article.
Overview
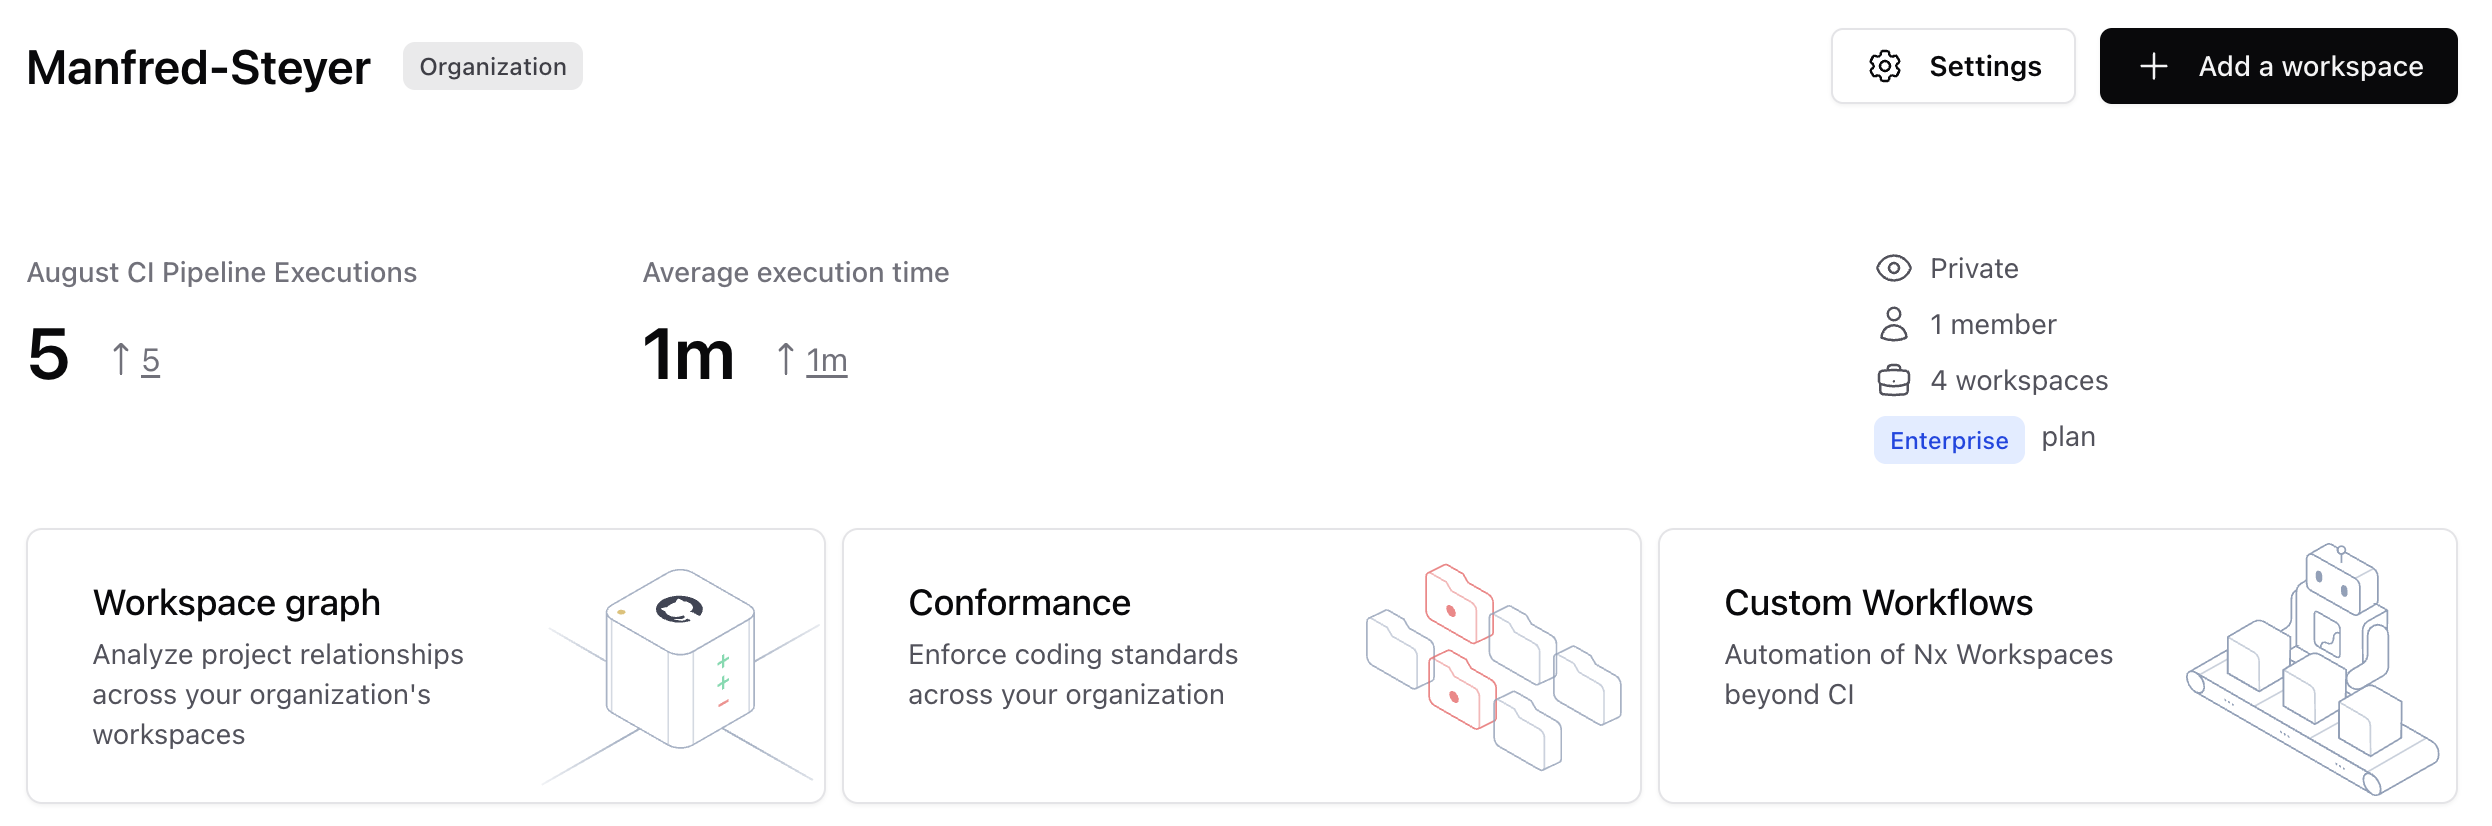
Nx Polygraph is part of the enterprise version of Nx Cloud, the commercial extension of the popular open-source solution Nx for managing workspaces. Polygraph currently consists of three features, accessible directly from the Nx Cloud Dashboard:
- Workspace Graph: Visualizes dependencies between different repositories
- Conformance: Manages cross-repo conformance rules and informs about rule violations
- Custom Workflows: Manages batch runs that collect information about the workspace graph or check connected repos for compliance with conformance rules
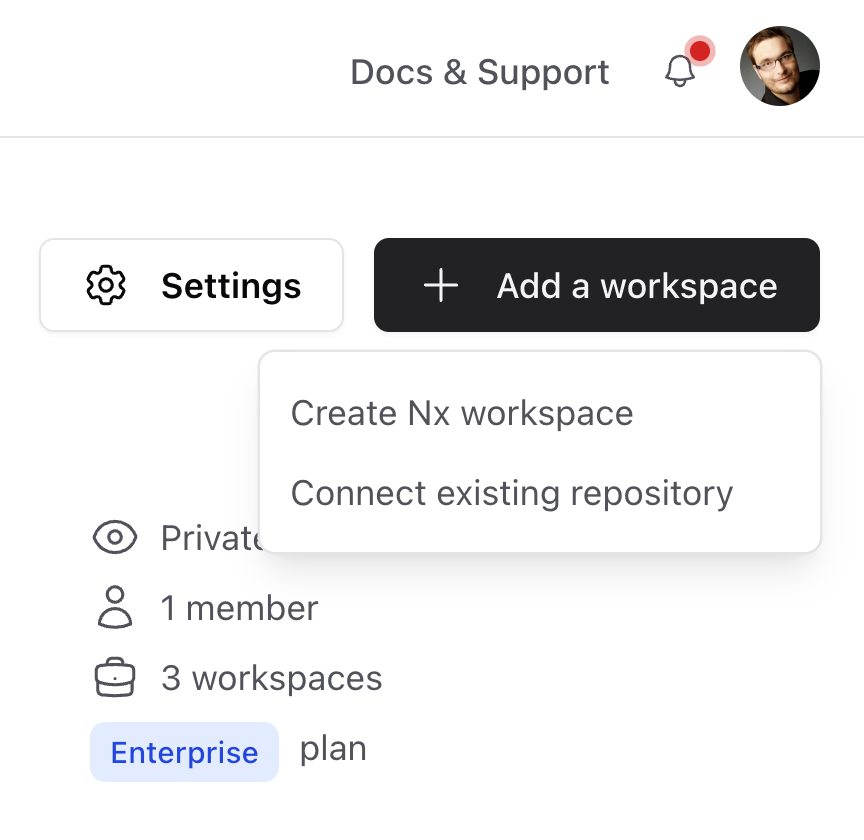
To connect an Nx workspace to Nx Cloud, use the statement
npx nx connectAlternatively,
- you can specify that you want to use Nx Cloud when setting up your workspace with
create-nx-workspace - Go to https://cloud.nx.app/get-started/ to create a new workspace or connect an existing one
You can also generate a build script for the CI environment:
npx nx g ci-workflowThe workspace must then be checked into source code management (e.g. GitHub) and added to your organization in the Nx Cloud Portal:
Workspace Graph
The workspace graph shows how the individual repos are connected. You can drill into the individual connected repos and see the applications and libraries managed there, as well as their dependencies. Dependencies between repos are npm packages that originate from one repo and are consumed by other repos.
For example, the following screenshot shows that project-a and project-b are located in different repos. However, the latter uses the calc library from project-a, which was deployed via an npm registry:
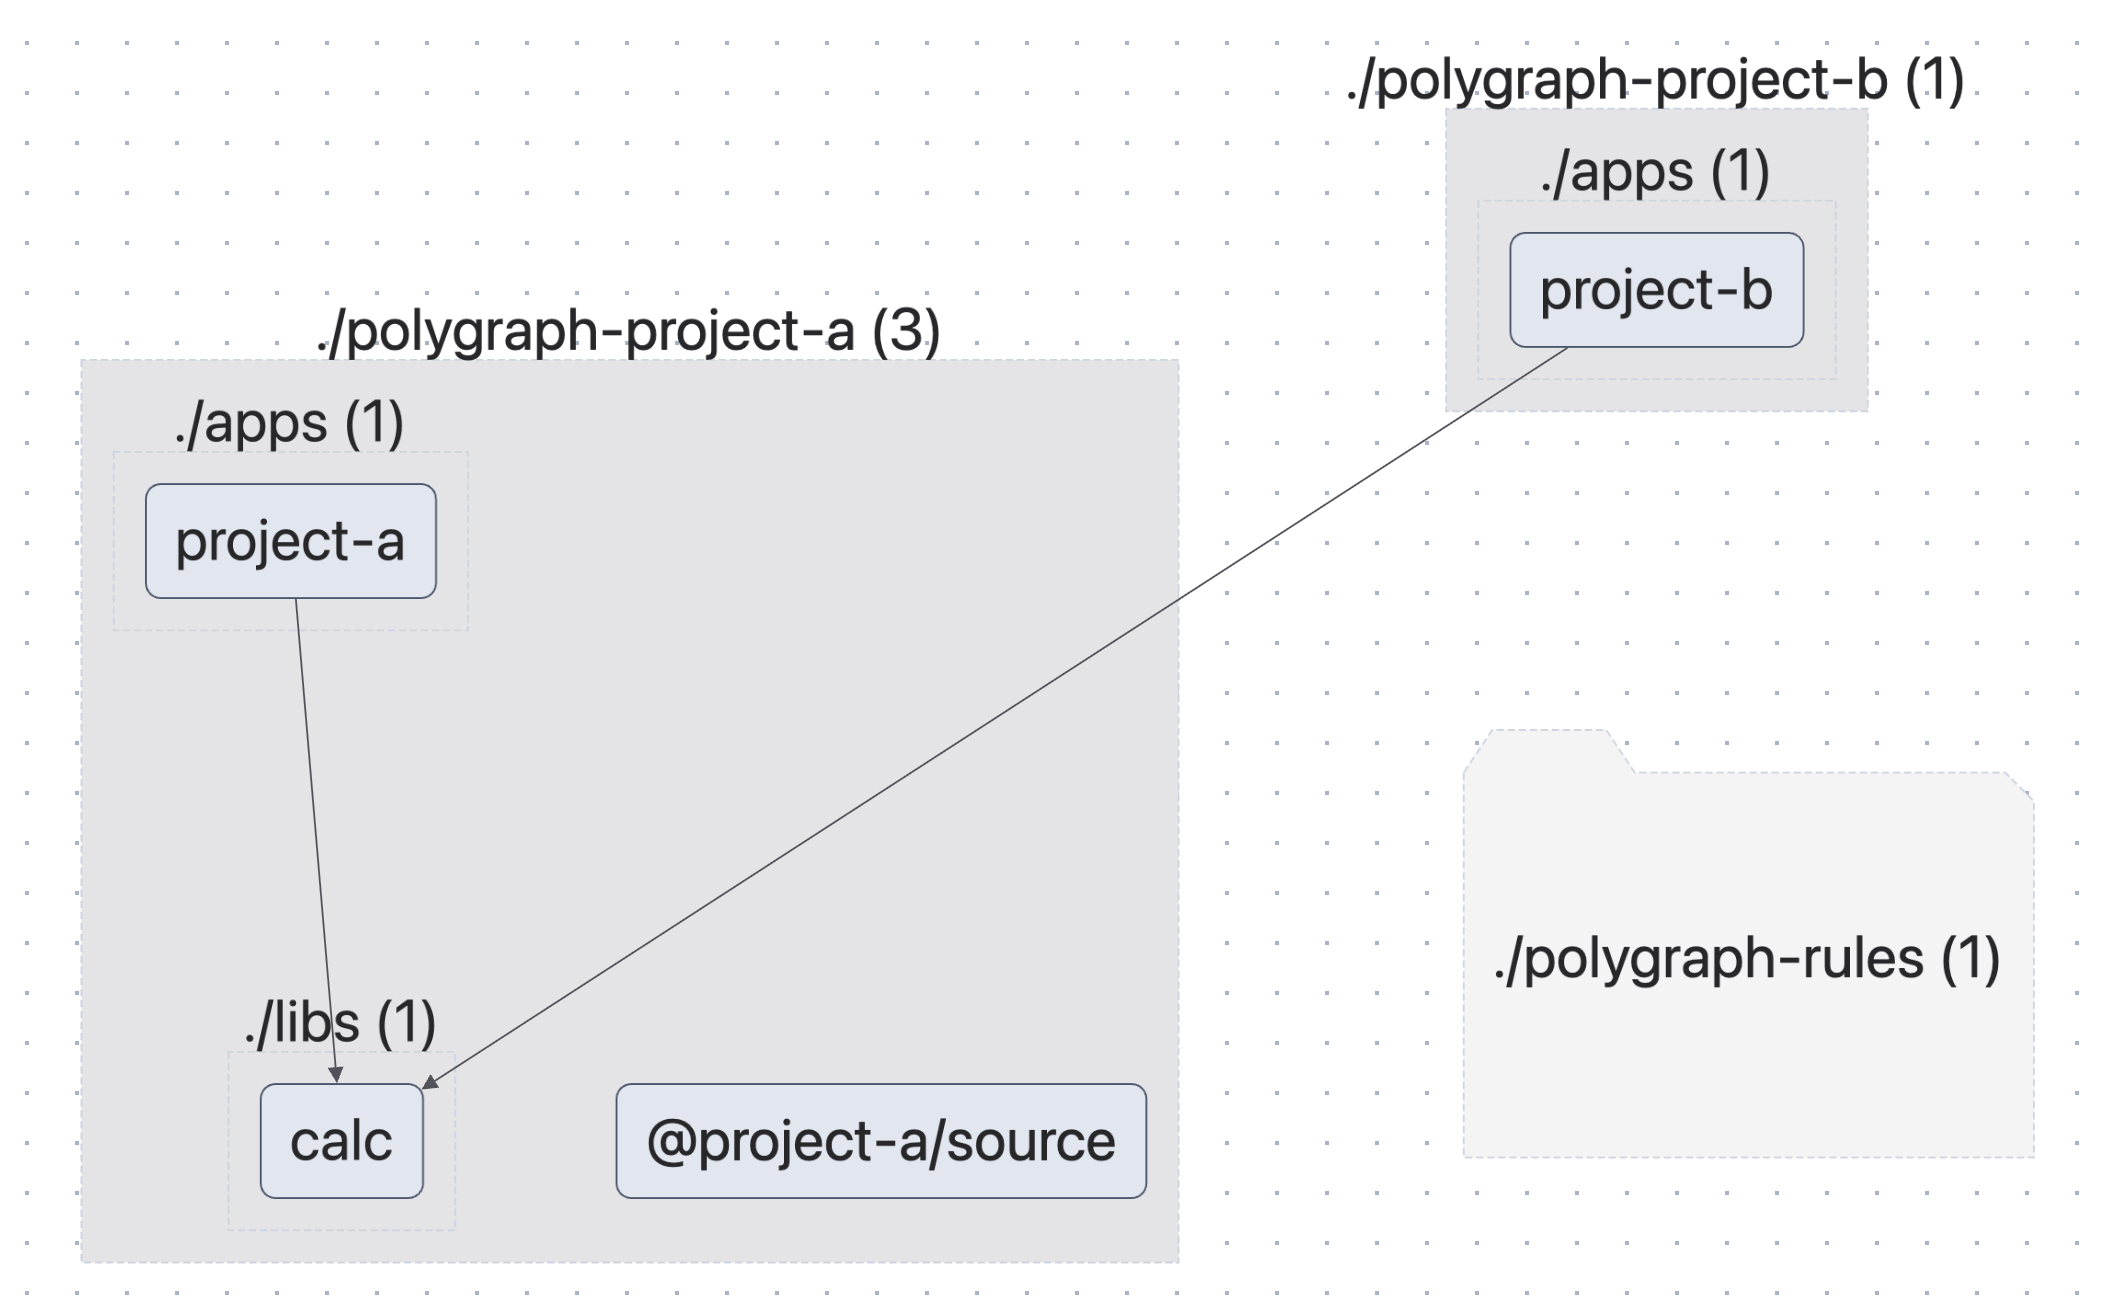
Nx automatically collects the information for the Workspace Graph when Nx (e.g., nx build or nx run-many) is executed as part of a build script in a CI environment, thus guaranteeing an always up to date representation of your dependencies even across repository boundaries.
Conformance
The Conformance Dashboard provides information about whether the connected repos comply with the configured rules. The following image, for example, shows four projects in my demo organization and three conformance rules. Unfortunately, project-b does not comply with the first one:
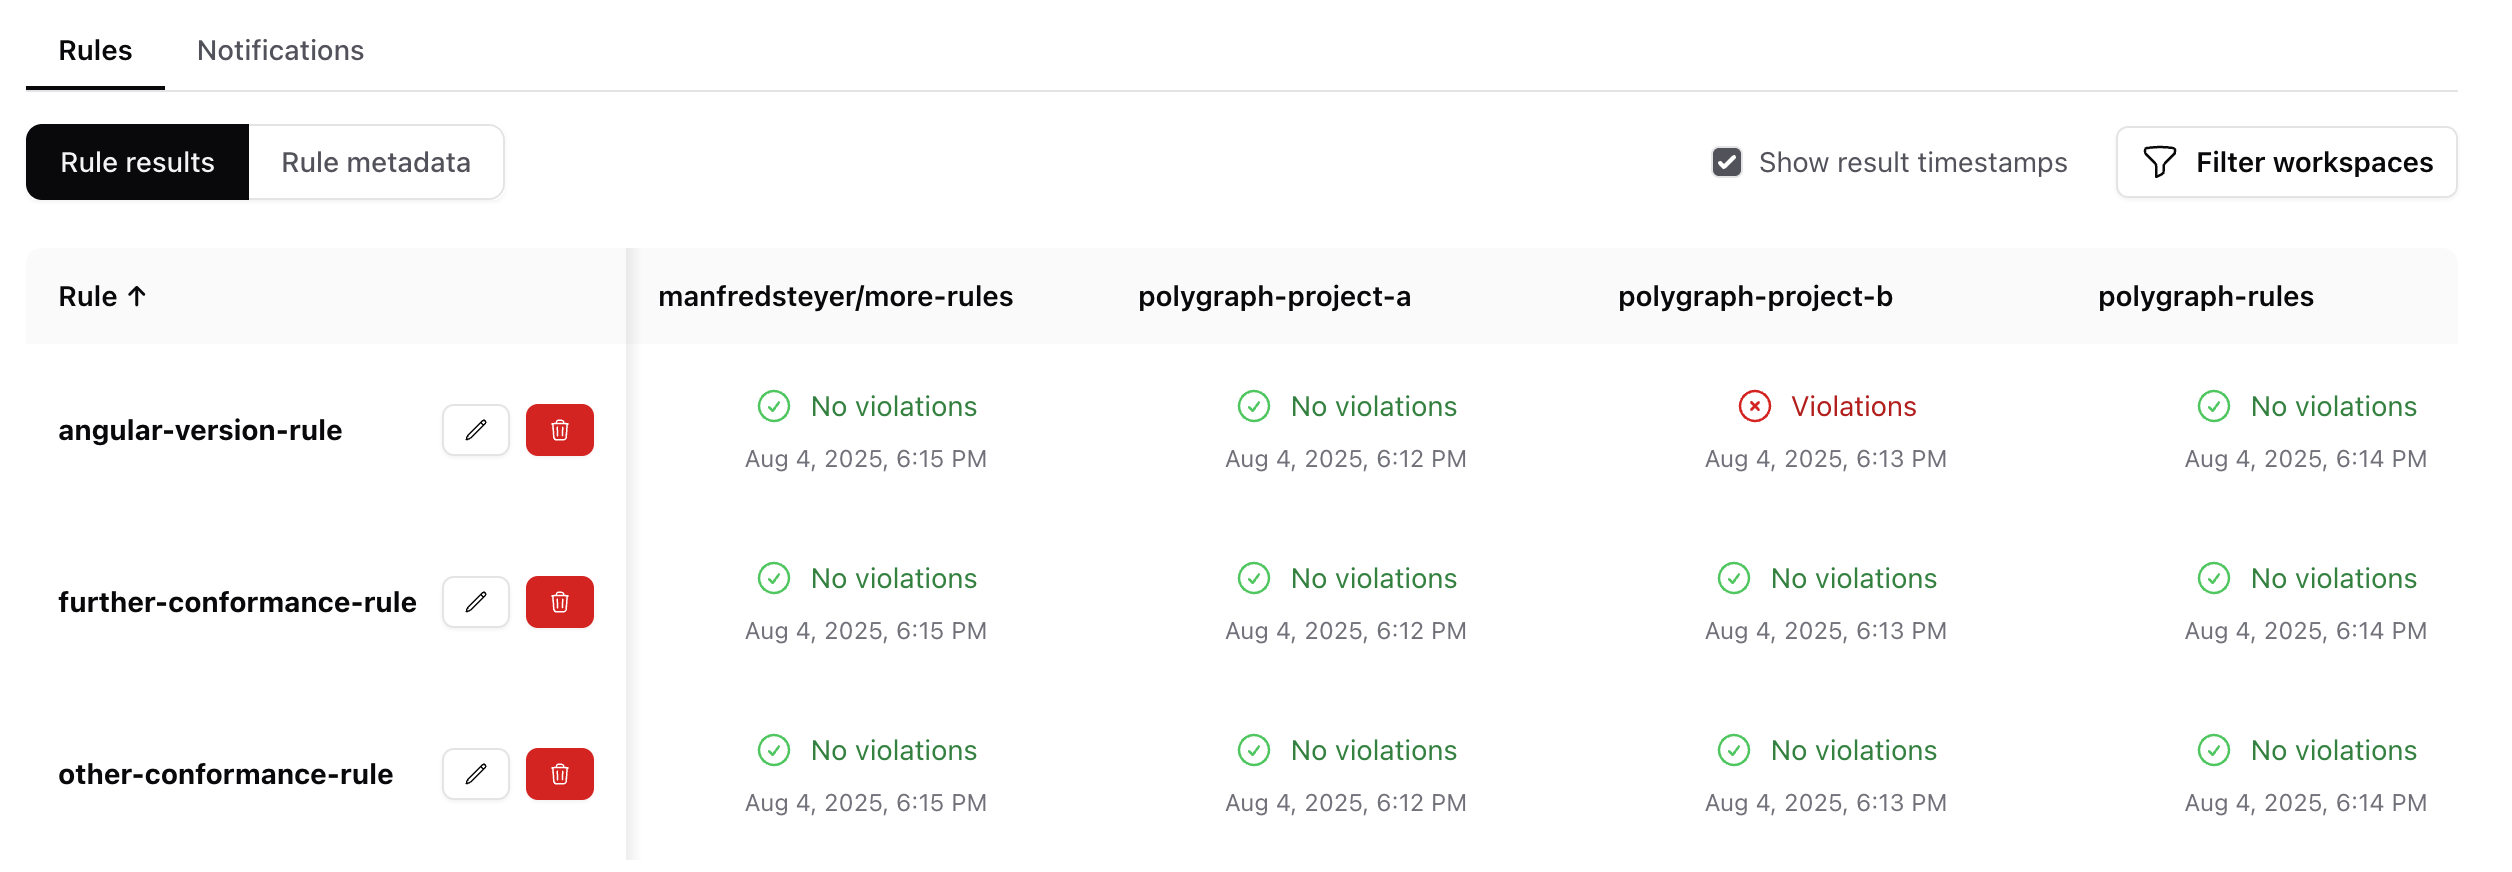
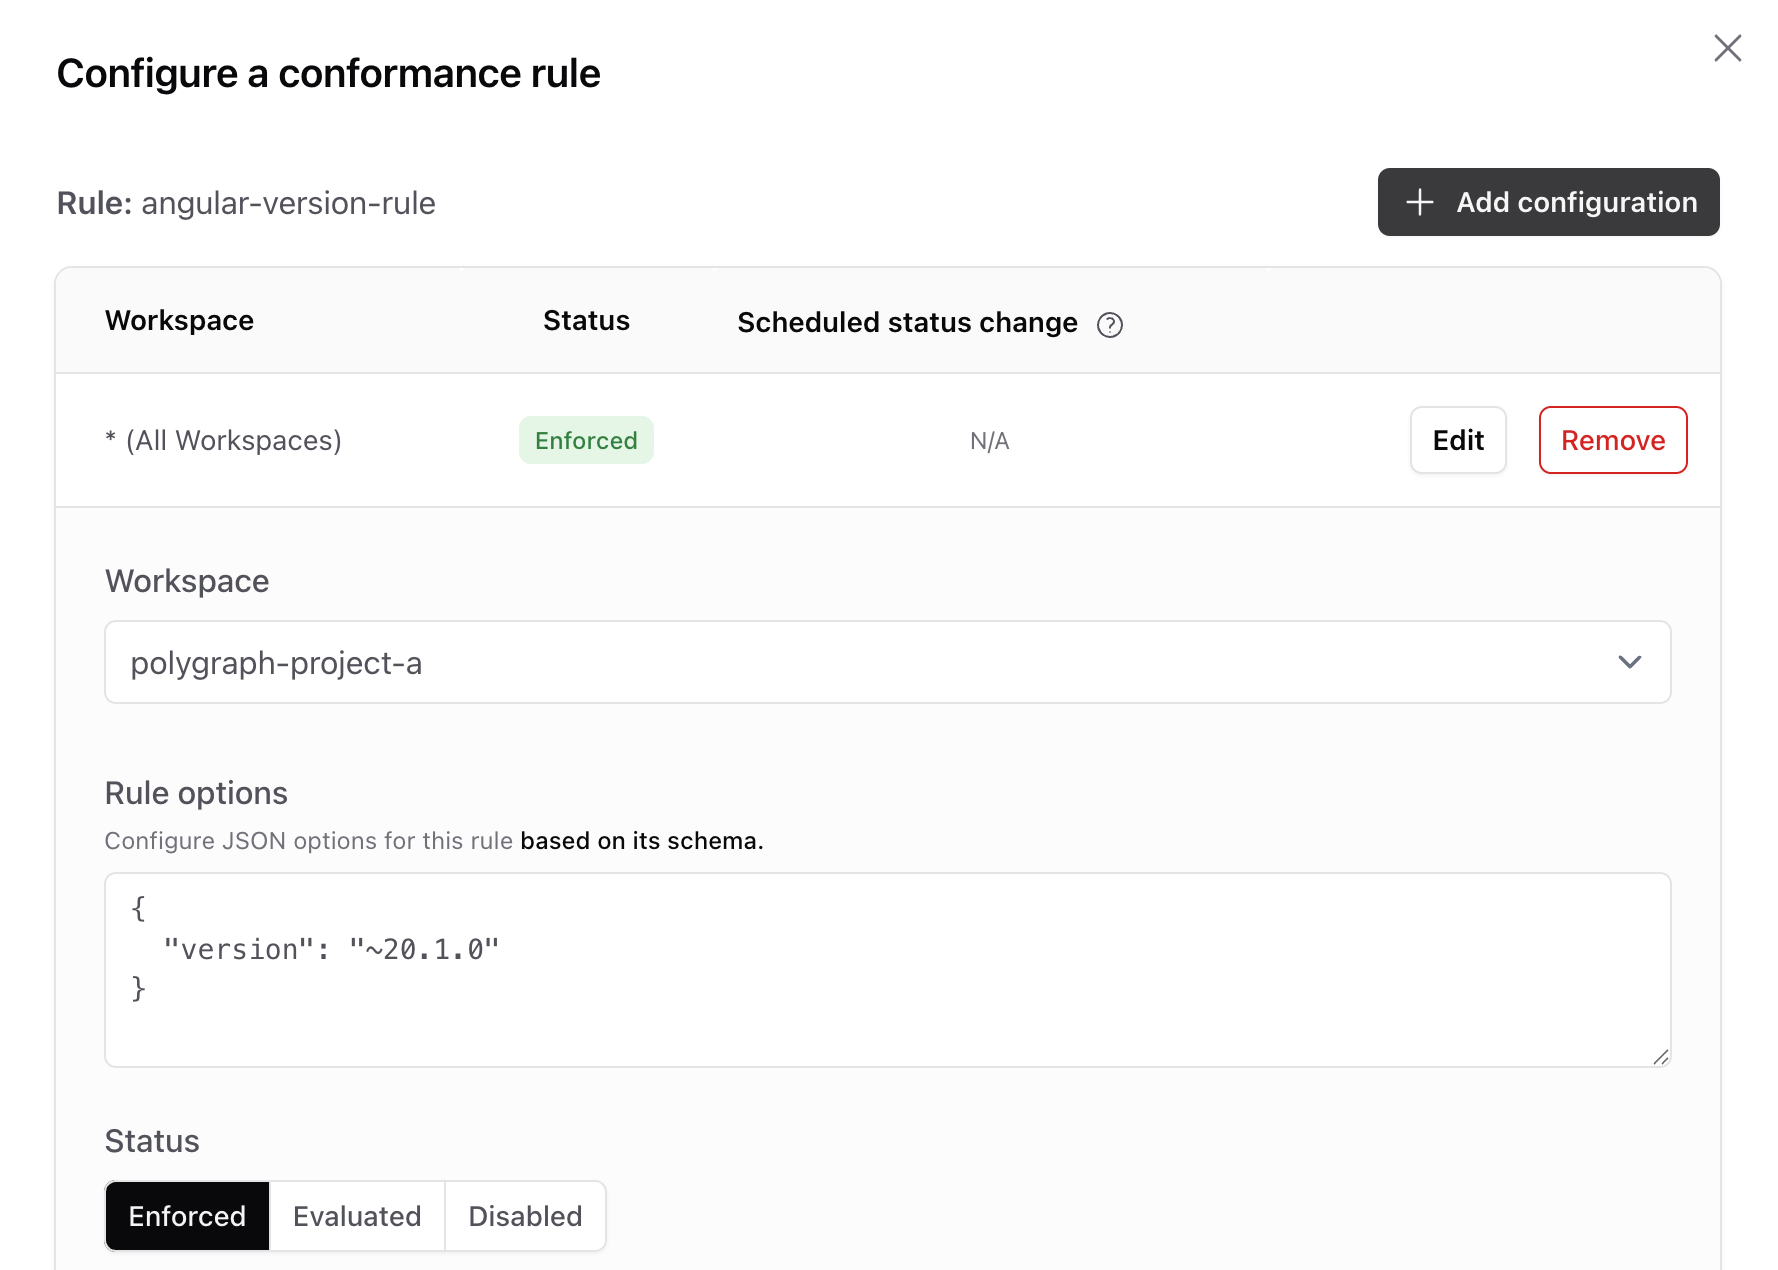
Under "Notifications", you can also enter email addresses for each project that should be notified in the event of a rule violation. The individual conformance rules are activated for individual or all projects and are configured accordingly. For example, the angular-version-rule, whose implementation I'll discuss below, receives the expected Angular version via its configuration. It checks the entries in the package.json against this version:
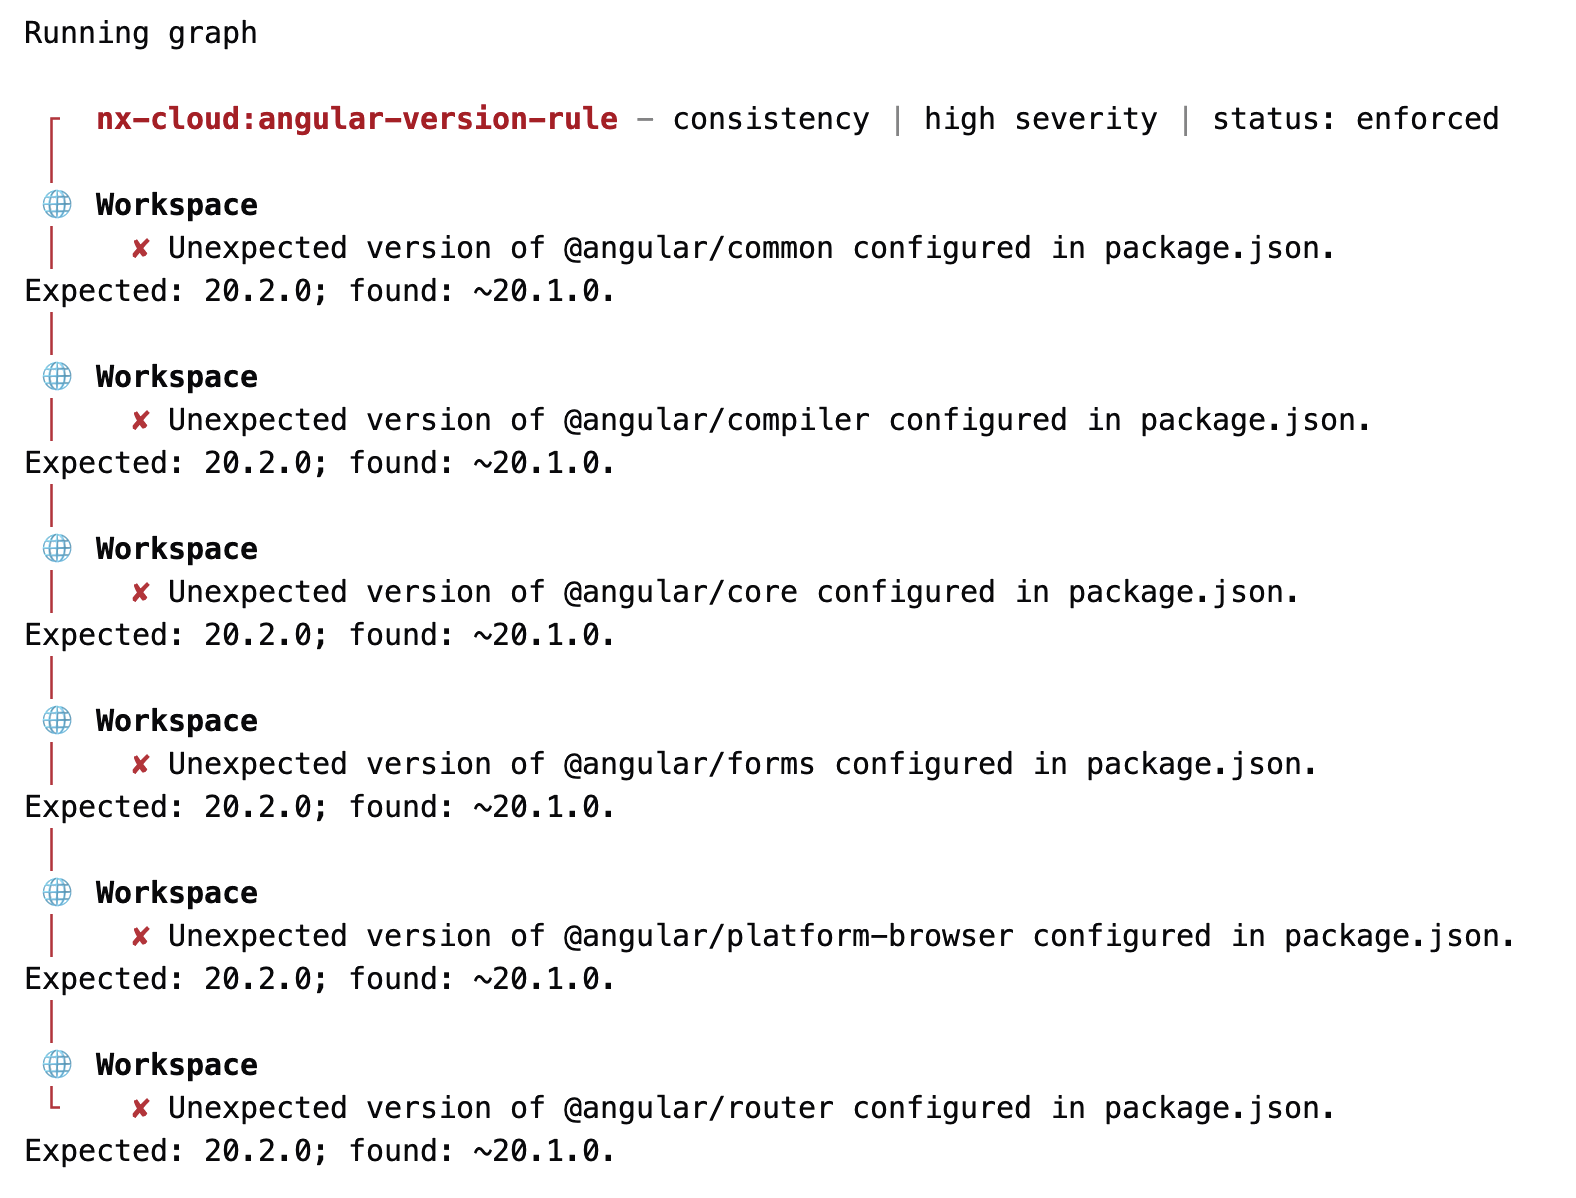
On request, the Nx Cloud provides further details on failed conformance rules:
To ensure that Nx Cloud checks the rules in the configured projects, a custom workflow must be set up. The available screens can be accessed via the dashboard.
More on this: Angular Architecture Workshop (Remote, Interactive, Advanced)
Become an expert for enterprise-scale and maintainable Angular applications with our Angular Architecture workshop!

English Version | German Version
Implementing a Conformance Rule
Nx gives us a lot of freedom when designing conformance rules, as they are technically JavaScript objects with metadata and an implementation method. This method reads selected files from the project to analyze, checks them, and returns an array containing the detected rule violations.
The following statement generates an Nx project for Conformance Rules:
npx create-nx-workspace more-rules --preset=@nx/conformanceSuch a project already contains an initial rule that can be used as a template for your own projects. Our conformance rule consists of a schema.json file, which describes the rule's configuration options using a JSON schema, and an index.ts file.
The schema.json for the angular-version-rule defines a property version of type string:
{
  "$schema": "http://json-schema.org/schema",
  "$id": "angular-version-rule",
  "title": "options for example conformance-rule rule checking for a specific Angular version",
  "type": "object",
  "properties": {
    "version": {
      "type": "string"
    }
  },
  "required": ["version"],
  "additionalProperties": false
}
To use the stored configuration in the program code, a corresponding type is also required:
export type AngularVersionConformanceOptions = {
  version: string;
};
For simplicity, I created this type manually. For larger projects, it is recommended to generate such types. Npm packages such as json-schema-to-typescript can be used for this purpose.
The index.ts file publishes the conformance rule based on it as a default export. It is configured with createConformanceRule and receives metadata such as name, category, and description.
import { createConformanceRule, ConformanceViolation } from '@nx/conformance';

[…]

export default createConformanceRule({
  name: 'angular-version-rule',
  category: 'consistency',
  description: 'An example conformance rule checking for a specific Angular version',
  implementation: async (context) => {

    const options = context.ruleOptions as AngularVersionConformanceOptions;
    const version = options.version;
    const violations: ConformanceViolation[] = [];
    const packagePath = path.join(workspaceRoot, 'package.json');

    try {
      const versionViolations = checkVersions(packagePath, version);
      violations.push(...versionViolations);
    }
    catch(e) {
      violations.push({
        workspaceViolation: true,
        message: Error reading package.json: ${e},
      });
    }

    return {
      severity: 'high',
      details: {
        violations,
      },
    };
  },
});
The defined name must be unique in order to avoid issues when deploying the rule later. The rule implementation first retrieves the configured ruleOptions from the context object passed by Nx. After a type assertion to AngularVersionConformanceOptions, the configured version number is read. It then delegates to the checkVersions function. This function goes through all dependencies in the dependencies node and checks all those that start with @angular/ for the desired version number:
export type PackageJson = {
  dependencies: Record<string, string>
};

function checkVersions(packagePath: string, version: string) {
  const packageInfo = readJsonFile(packagePath) as PackageJson;
  const deps = packageInfo.dependencies;

  const versionViolations: ConformanceViolation[] = [];

  for (const dep of Object.keys(deps)) {
    if (dep.startsWith('@angular/') && deps[dep] !== version) {
      versionViolations.push({
        workspaceViolation: true,
        message: `Unexpected version of ${dep} configured in package.json.
Expected: ${version}; found: ${deps[dep]}.`,
      });
    }
  }
  return versionViolations;
}
This is primarily for illustrative purposes. In practice, you would also need to check for devDependencies like @angular/build, as well as other packages that interact with the respective Angular core packages but have different versions themselves. Examples include Nx itself and component libraries.
Trying out a Conformance Rule
To try out the conformance rule locally, it must be registered in your workspace's nx.json:
{
  […],
  "conformance": {
    "rules": [
      {
        "rule": "./packages/conformance-rules/src/angular-version-rule",
        "options": {
          "version": "20.1.0"
        }
      }
    ]
  }
}
The rule property points to the directory containing index.ts, and options specifies the configuration options described by the schema.
To execute the registered rules in the local project, simply call
npx nx conformance checkPublishing a Conformance Rule
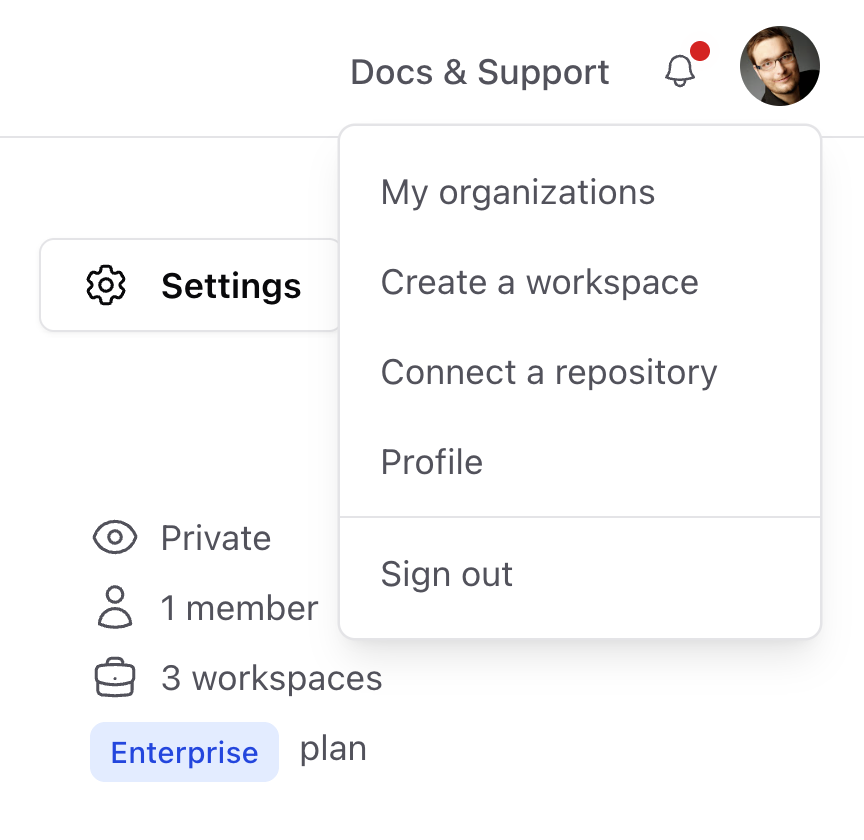
In order for the rule to be configured in the Nx Cloud for the connected projects, it must be deployed. For security reasons, a Personal Access Token must be set up in the project containing the rules. This token can be obtained in the Nx Cloud in the profile area of the respective user:
The token can then be configured for the current project using the following statement:
npx nx-cloud configure --personal-access-token NzQ2MD...The following statement is then used to deploy the rule:
npx nx publish-conformance-rules --project conformance-rulesTo run the rule for any connected project in the Nx Cloud, execute the following statement in this project:
npx nx-cloud conformance checkAfter deployment, you can also see the rule in the Nx Cloud and configure it for different projects. To ensure it is executed regularly and the Conformance Dashboard displays the current results, you still need to set up the custom workflow briefly mentioned above.
Conclusion
Nx Polygraph helps bring order to complex, distributed repository landscapes. One example is Micro Frontend scenarios where multiple projects are built on the same stack. Conformance rules ensure consistency and transparency.
The ability to define your own rules and deploy them via the Nx Cloud opens up scope for cross-team quality standards. This transforms a previously difficult-to-understand, heterogeneous project landscape into controlled and consistent workspaces.