

In the previous article of this series, I showed how to use Dynamic Module Federation. This allows us to load Micro Frontends -- or remotes, which is the more general term in Module Federation -- not known at compile time. We don't even need to know the number of remotes upfront.
While the previous article leveraged the router for integrating remotes available, this article shows how to load individual components. The example used for this is a simple plugin-based workflow designer.
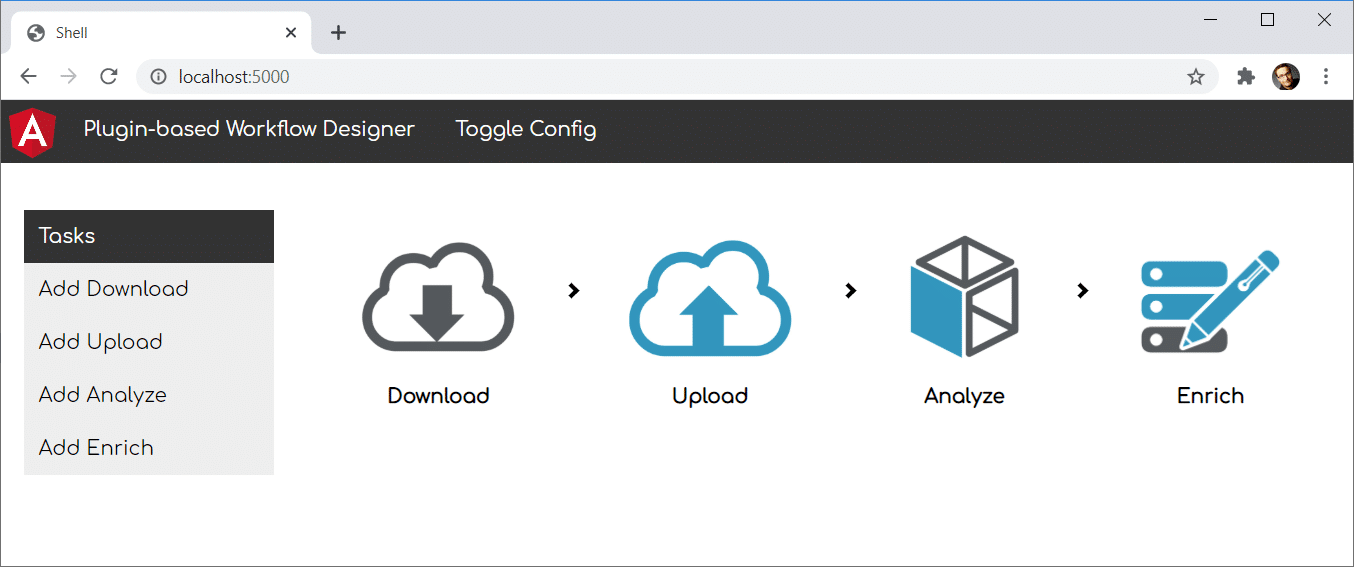
The workflow designer acts as a so-called host loading tasks from plugins provided as remotes. Thus, they can be compiled and deployed individually. After starting the workflow designer, it gets a configuration describing the available plugins:
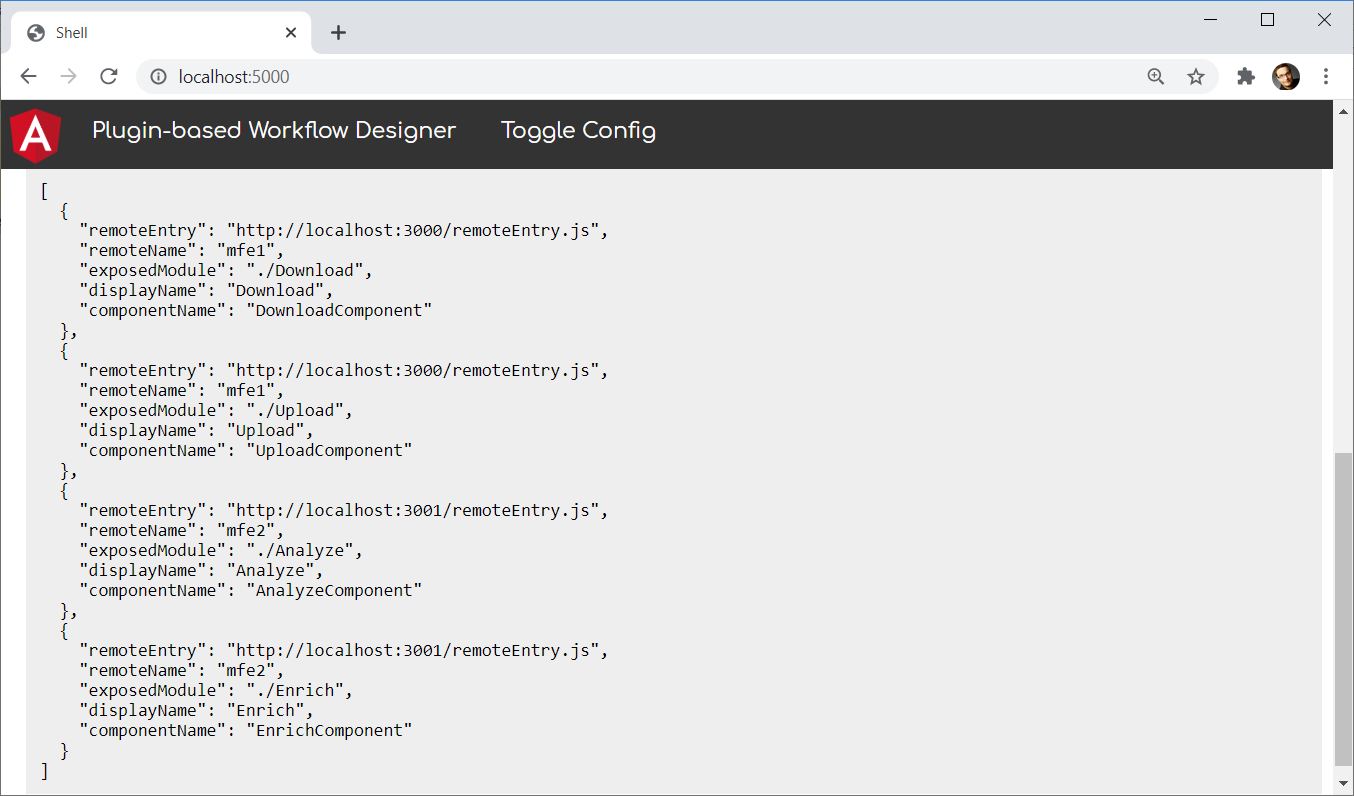
Please note that these plugins are provided via different origins (http://localhost:4201 and http://localhost:4202), and the workflow designer is served from an origin of its own (http://localhost:4200).
Thanks to Zack Jackson and Jack Herrington, who helped me to understand the rater new API for Dynamic Module Federation.
Important: This article is written for Angular and Angular CLI 14.x and above. Make sure you have a fitting version if you try out the examples outlined here! For more details on the differences/ migration to Angular 14.x please see this migration guide.
Building the Plugins
The plugins are provided via separate Angular applications. For the sake of simplicity, all applications are part of the same monorepo. Their webpack configuration uses Module Federation for exposing the individual plugins as shown in the previous articles of this series:
const { shareAll, withModuleFederationPlugin } = require('@angular-architects/module-federation/webpack');

 module.exports = withModuleFederationPlugin({

   name: 'mfe1',

   exposes: {
     './Download': './projects/mfe1/src/app/download.component.ts',
     './Upload': './projects/mfe1/src/app/upload.component.ts'
   },

   shared: {
     ...shareAll({ singleton: true, strictVersion: true, requiredVersion: 'auto' }),
   },

 });
One difference to the configurations shown in the previous articles is that here we are directly exposing standalone components. Each component represents a task that can be put into the workflow.
The combination of singleton: true and strictVersion: true makes webpack emit a runtime error when the shell and the micro frontend(s) need different incompatible versions (e. g. two different major versions). If we skipped strictVersion or set it to false, webpack would only emit a warning at runtime.
Loading the Plugins into the Workflow Designer
For loading the plugins into the workflow designer, I'm using the helper function loadRemoteModule provided by the @angular-architects/module-federation plugin. To load the above mentioned Download task, loadRemoteModule can be called this way:
import { loadRemoteModule } from '@angular-architects/module-federation';

 [...]

 const component = await loadRemoteModule({
     type: 'module',
     remoteEntry: 'http://localhost:4201/remoteEntry.js',
     exposedModule: './Download'
 })
Providing Metadata on the Plugins
At runtime, we need to provide the workflow designer with key data about the plugins. The type used for this is called PluginOptions and extends the LoadRemoteModuleOptions shown in the previous section by a displayName and a componentName:
export type PluginOptions = LoadRemoteModuleOptions & {
     displayName: string;
     componentName: string;
 };
An alternative to this is extending the Module Federation Manifest as shown in the previous article on Dynamic Module Federation.
While the displayName is the name presented to the user, the componentName refers to the TypeScript class representing the Angular component in question.
For loading this key data, the workflow designer leverages a LookupService:
@Injectable({ providedIn: 'root' })
 export class LookupService {
     lookup(): Promise<PluginOptions[]> {
         return Promise.resolve([
             {
                 type: 'module',
                 remoteEntry: 'http://localhost:4201/remoteEntry.js',
                 exposedModule: './Download',

                 displayName: 'Download',
                 componentName: 'DownloadComponent'
             },
             [...]
         ] as PluginOptions[]);
     }
 }
For the sake of simplicity, the LookupService provides some hardcoded entries. In the real world, it would very likely request this data from a respective HTTP endpoint.
Dynamically Creating the Plugin Component
The workflow designer represents the plugins with a PluginProxyComponent. It takes a PluginOptions object via an input, loads the described plugin via Dynamic Module Federation and displays the plugin's component within a placeholder:
@Component({
     standalone: true,
     selector: 'plugin-proxy',
     template: `
         <ng-container #placeHolder></ng-container>
     `
 })
 export class PluginProxyComponent implements OnChanges {
     @ViewChild('placeHolder', { read: ViewContainerRef, static: true })
     viewContainer: ViewContainerRef;

     constructor() { }

     @Input() options: PluginOptions;

     async ngOnChanges() {
         this.viewContainer.clear();

         const Component = await loadRemoteModule(this.options)
             .then(m => m[this.options.componentName]);

         this.viewContainer.createComponent(Component);
     }
 }
In versions before Angular 13, we needed to use a ComponentFactoryResolver to get the loaded component's factory:
// Before Angular 13, we needed to retrieve a ComponentFactory
 //
 // export class PluginProxyComponent implements OnChanges {
 //     @ViewChild('placeHolder', { read: ViewContainerRef, static: true })
 //     viewContainer: ViewContainerRef;

 //     constructor(
 //       private injector: Injector,
 //       private cfr: ComponentFactoryResolver) { }

 //     @Input() options: PluginOptions;

 //     async ngOnChanges() {
 //         this.viewContainer.clear();

 //         const component = await loadRemoteModule(this.options)
 //             .then(m => m[this.options.componentName]);

 //         const factory = this.cfr.resolveComponentFactory(component);

 //         this.viewContainer.createComponent(factory, null, this.injector);
 //     }
 // }
Wiring Up Everything
Now, it's time to wire up the parts mentioned above. For this, the workflow designer's AppComponent gets a plugins and a workflow array. The first one represents the PluginOptions of the available plugins and thus all available tasks while the second one describes the PluginOptions of the selected tasks in the configured sequence:
@Component({ [...] })
 export class AppComponent implements OnInit {

   plugins: PluginOptions[] = [];
   workflow: PluginOptions[] = [];
   showConfig = false;

   constructor(
     private lookupService: LookupService) {
   }

   async ngOnInit(): Promise<void> {
     this.plugins = await this.lookupService.lookup();
   }

   add(plugin: PluginOptions): void {
     this.workflow.push(plugin);
   }

   toggle(): void {
     this.showConfig = !this.showConfig;
   }
 }
The AppComponent uses the injected LookupService for populating its plugins array. When a plugin is added to the workflow, the add method puts its PluginOptions object into the workflow array.
For displaying the workflow, the designer just iterates all items in the workflow array and creates a plugin-proxy for them:
<ng-container *ngFor="let p of workflow; let last = last">
     <plugin-proxy [options]="p"></plugin-proxy>
     <i *ngIf="!last" class="arrow right" style=""></i>
 </ng-container>
As discussed above, the proxy loads the plugin (at least, if it isn't already loaded) and displays it.
Also, for rendering the toolbox displayed on the left, it goes through all entries in the plugins array. For each of them it displays a hyperlink calling bound to the add method:
<div class="vertical-menu">
     <a href="#" class="active">Tasks</a>
     <a *ngFor="let p of plugins" (click)="add(p)">Add {{p.displayName}}</a>
 </div>
Conclusion
While Module Federation comes in handy for implementing Micro Frontends, it can also be used for setting up plugin architectures. This allows us to extend an existing solution by 3rd parties. It also seems to be a good fit for SaaS applications, which needs to be adapted to different customers' needs.
What's next? More on Architecture!
So far, we've seen that Module Federation is a straightforward solution for creating Micro Frontends on top of Angular. However, when dealing with it, several additional questions come in mind:
- According to which criteria can we sub-divide a huge application into Micro Frontends?
- Which access restrictions make sense?
- Which proven patterns should we use?
- How can we avoid pitfalls when working with Module Federation?
- Which advanced scenarios are possible?
Our free eBook (about 100 pages) covers all these questions and more:
Feel free to download it here now!