

Defining an architecture is exciting. However, implementing it can also be boring because it involves dealing with the same patterns and practices time and again. Automating this task with scaffolding is the solution. Fortunately, the Angular CLI itself comes with a scaffolding tool called Schematics.
In this article series, I show how to use Schematics within a monorepo. For this, I'm using Workspace Schematics provided by Nx. While everything I show also works with an classic Angular project, Nx provides some tooling and hence increases the convenience.
As always, the source code can be found in my GitHub account.
Example
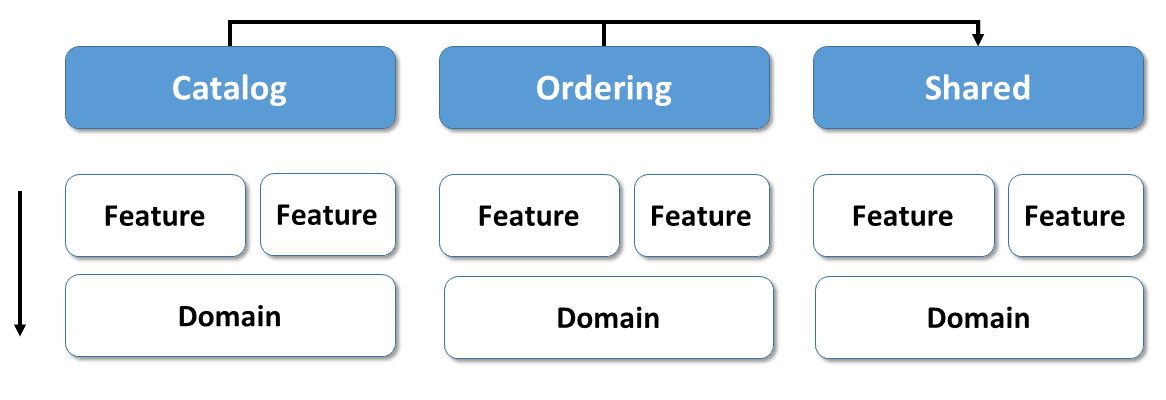
The architecture I automate in this article series is subdividing a big application into (more or less) self contained sub domains:
This style which I described in my blog series about Domain Driven Design decouples the domains from each other and hence makes breaking changes between domains more unlikely. Also, it limits the complexity. If you already know this article, you can directly proceed with the next section.
In our architecture, each domain has several libraries within a monorepo. Feature libraries implement use cases with smart components. Domain libraries consist of our domain logic and a domain model. Also, there are some other types of libraries as outlined in the mentioned blog series.
To prevent that the individual libraries depend too much on each other there are access rules. They are implied by the arrows in the last picture. According to that, one layer is only allowed to access layers below. In the simplified version here this means that a feature can access the domain but not vice verse. The more important access rule, however, states that libraries in one domain can only access other libraries in the very same domain as well as in the shared slice.
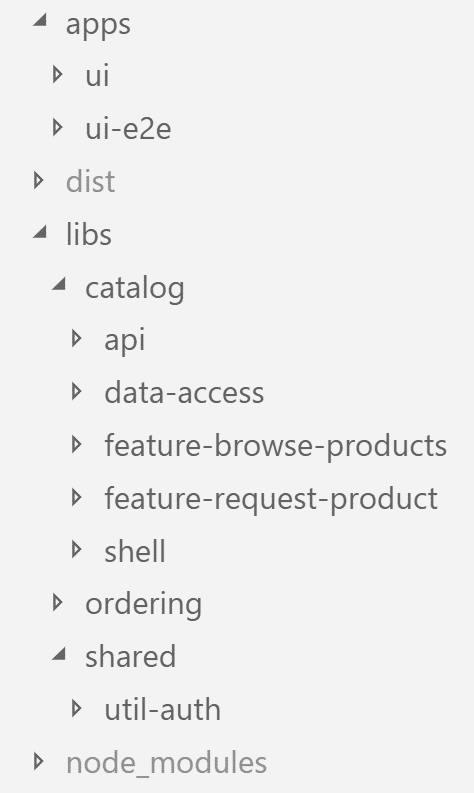
Within the mononorepo's lib folder there is one sub folder per domain. This folder contains the domain's libraries:
Nx allows us to enforce the mentioned access rules between libraries. For this, we have to assign tags to each library within nx.json:
[...]
"catalog-domain": {
    "tags": ["domain:catalog", "type:domain-logic"]
},
"ordering-domain": {
    "tags": ["domain:ordering", "type:domain-logic"]
},
[...]
Then, within tsconfig.json we can use the rule nx-enforce-module-boundaries to define restrictions
[...]
"nx-enforce-module-boundaries": [
  true,
  {
    "allow": [],
    "depConstraints": [
      {
        "sourceTag": "*",
        "onlyDependOnLibsWithTags": ["*"]
      },
      {
        "sourceTag": "domain:catalog",
        "onlyDependOnLibsWithTags": ["domain:catalog", "shared"]
      },
      {
        "sourceTag": "domain:ordering",
        "onlyDependOnLibsWithTags": ["domain:ordering", "shared"]
      }
    ]
  }
],
[...]
As you can imagine, while this architecture is clear and prevents coupling, creating all the building blocks as well as configuring the linting rule is monotonous and time-consuming. Fortunately, as the next sections show, we can automate all this with Schematics.
More about this very architecture can be found in my other blog articles here. Also, working with architectures like this one is a big topic in our Angular Workshops.

About Workspace Schematics
To scaffold files the Angular CLI uses a tool called Schematics. Every time we call ng new, ng generate, ng add, and ng update the CLI delegates to it. However, it also allows to write custom code generators which are also called schematics.
While we can directly setup a Schematics project and distribute it via npm, Nrwl's Nx provides a more convenient way: It allows to scaffold a new schematic within a workspace like we scaffold components or services. Also, it provides a command to compile and execute it in the same workspace.
As the schematics are part of the monorepo where they are used, this approach is the right one for generating code which is very project specific.
Scaffolding a workspace schematic
After creating an Nx workspace using
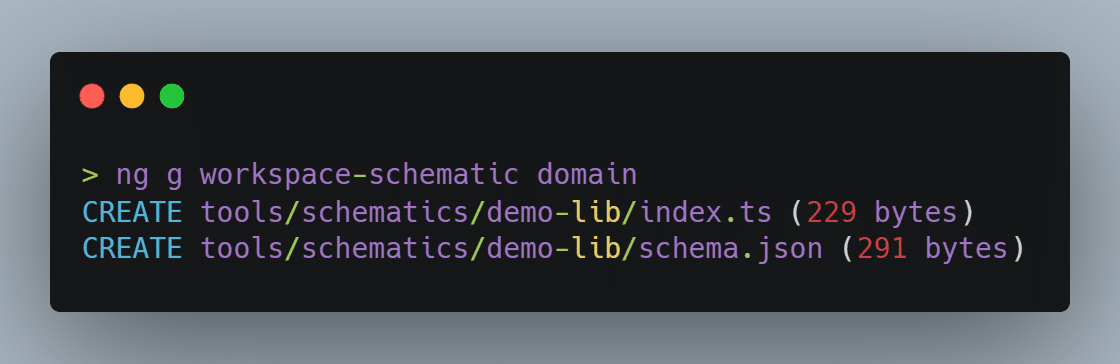
npx create-nx-workspace@latest e-procwe can scaffold a workspace schematic:
ng g workspace-schematic demo-libThis creates two files -- an index.ts with the schematic's implementation and a schema.json describing the parameters we can pass to the schematic:
The generated schema.json looks like this:
{
  "$schema": "http://json-schema.org/schema",
  "id": "domain",
  "type": "object",
  "properties": {
    "name": {
      "type": "string",
      "description": "Library name",
      "$default": {
        "$source": "argv",
        "index": 0
      }
    }
  },
  "required": ["name"]
}
It just defines a required parameter name. According to the $default property, it gets the value of the first passed parameter if not specified explicitly using --name. Hence, we can call it with the Nx CLI using
nx workspace-schematic domain myDomainor using
nx workspace-schematic domain --name myDomainThe generated implementation within index.ts just contains a rule factory:
import { chain, externalSchematic, Rule } from '@angular-devkit/schematics';

export default function(schema: any): Rule {
  return chain([
    externalSchematic('@nrwl/workspace', 'lib', {
      name: schema.name
    })
  ]);
}
Rules are the individual steps needed to scaffold files. The returned rule is a chain which just calls other rules in sequence. The only rule chain currently delegates to is externalSchematic. As the name indicates, it is calling another schematic. In this case it is the lib schematic which is also called when running ng generate lib by hand.
Please also note the schema parameter. It contains all passed command line parameters and has the structure described by the schema.json file.
After looking at these generated files, let's now find out how to modify them for our own goals.
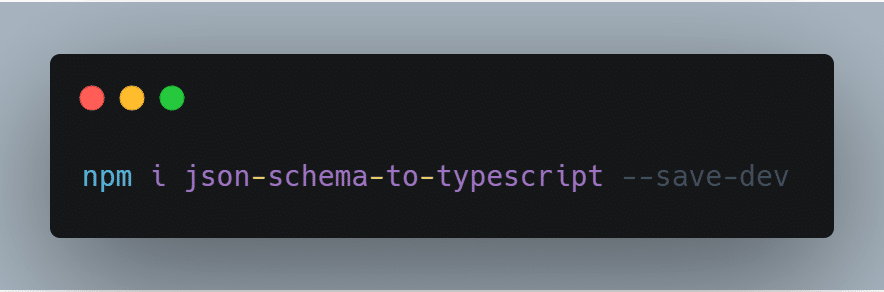
Generating a TypeScript Interface for schema.json
As using any for the schema parameter is somewhat unpretty, let's provide a type for it. In order to not repeat ourselves we should generate it out of the schema.json. The npm package json-schema-to-typescript can help with this:
We can call it within a simple node script I'm calling json-schema-to-ts.js:
const toTypeScript = require('json-schema-to-typescript');
const fs = require('fs');

toTypeScript
    .compileFromFile('tools/schematics/domain/schema.json')
    .then(ts => fs.writeFileSync('tools/schematics/domain/schema.ts', ts));
For calling it, I've also defined an npm script in my package.json:
[...]
"scripts": {
    [...]
    "build:schema": "node tools/schematics/json-schema-to-ts.js"
}
[...]
Now, after running
we get this file:
export interface Domain {
  /**
   * Library name
   */
  name: string;
  [k: string]: any;
}
Perhaps you've noticed that the name of this interface is the value of the id property in the schema.json.
Step 3: Defining Options
Now, let's add an additional parameter addApp:
{
  "$schema": "http://json-schema.org/schema",
  "id": "domain-options",
  "type": "object",
  "properties": {
    "name": {
      "type": "string",
      "description": "Domain name",
      "$default": {
        "$source": "argv",
        "index": 0
      }
    },
    "addApp": {
      "type": "boolean",
      "description": "Add an app for the domain?",
      "default": false
    }
  },
  "required": ["name"]
}
If set to true, it shall also generate an app for the domain we're scaffolding. Also, I've set the id property to DomainOptions to influence the name of the generated interface.
After calling
one more time, we get this:
export interface DomainOptions {
  /**
   * Domain name
   */
  name: string;
  /**
   * Add an app for the domain?
   */
  addApp?: boolean;
  [k: string]: any;
}
Also, we can now type the options property with this interface:
export default function(options: DomainOptions): Rule {
    [...]
}
Calling Existing Rules
As we have a property for the addApp command line option now, we can use it within the rule:
  return chain([
    externalSchematic('@nrwl/angular', 'lib', {
      name: 'domain',
      directory: options.name,
      tags: domain:${options.name},type:domain-logic,
      style: 'scss',
    }),
    (!options.addApp) ?
      noop() :
      externalSchematic('@nrwl/angular', 'app', {
        name: options.name,
        tags: domain:${options.name},type:app,
        style: 'scss',
      }),
  ]);
This enhanced rule is chaining the noop (no operation) rule, if addApp is false. In this case, nothing happens. Otherwise, it executes the app schematic using externalSchematic.
Both externalSchematic calls also get some parameters, like the library's directory which is the domain name or tags for nx.json.
Creating a Custom Rules
So far, we used existing rules for our needs. But when it comes to updating the linting rules within tsconfig.json, we need to write a custom one.
For this rule, we need a factory with the parameters we want to pass:
export function updateLintingRules(domainName: string): Rule {
    return (host: Tree, context: SchematicContext) => {
        [...]
    }
}
The retuned rule is also just a function taking a Tree and a SchematicContext. The Tree represents your file system. Honestly, it is more of a staging area representing your file system.
This is an important concept of Schematics: The changes in the staging environment are only written to hard disk if everything worked. If there was an error, no change is written. This prevents getting an inconsistence state.
The full implementation of this rule is just reading the tslint.json. After parsing, the resulting object graph is changed and written back to the same file:
import { Rule, Tree, SchematicContext  } from '@angular-devkit/schematics';

export function updateLintingRules(domainName: string): Rule {
    return (host: Tree, context: SchematicContext) => {
      const text = host.read('tslint.json').toString();
      const rules = JSON.parse(text);

      // Make sure, rules['rules']['nx-enforce-module-boundaries'][1]['depConstraints'] exists!

      const depConst = rules['rules']['nx-enforce-module-boundaries'][1]['depConstraints'];

      depConst.push({
        'sourceTag': domain:${domainName},
        'onlyDependOnLibsWithTags': [domain:${domainName}, 'shared']
      });

      const newText = JSON.stringify(rules, undefined, 2);
      host.overwrite('tslint.json', newText);
    }
  }
As you see here, it adds an access restriction preventing libraries in the added domain to access libraries in other domains. The only exception is the shared slice.
After providing this rule, we can call it in our schematic:
  return chain([
    externalSchematic('@nrwl/angular', 'lib', {
      name: 'domain',
      directory: options.name,
      tags: domain:${options.name},type:domain-logic,
      style: 'scss',
    }),
    (!options.addApp) ?
      noop() :
      externalSchematic('@nrwl/angular', 'app', {
        name: options.name,
        tags: domain:${options.name},type:app,
        style: 'scss',
      }),
    // Added Rule vvvvvv
    updateLintingRules(options.name),
  ]);
Calling the Workspace Schematic
Now, let's call our workspace schematic. To make my live easier, I've installed the Nx CLI for that globally:
Using it, we can execute our schematic:
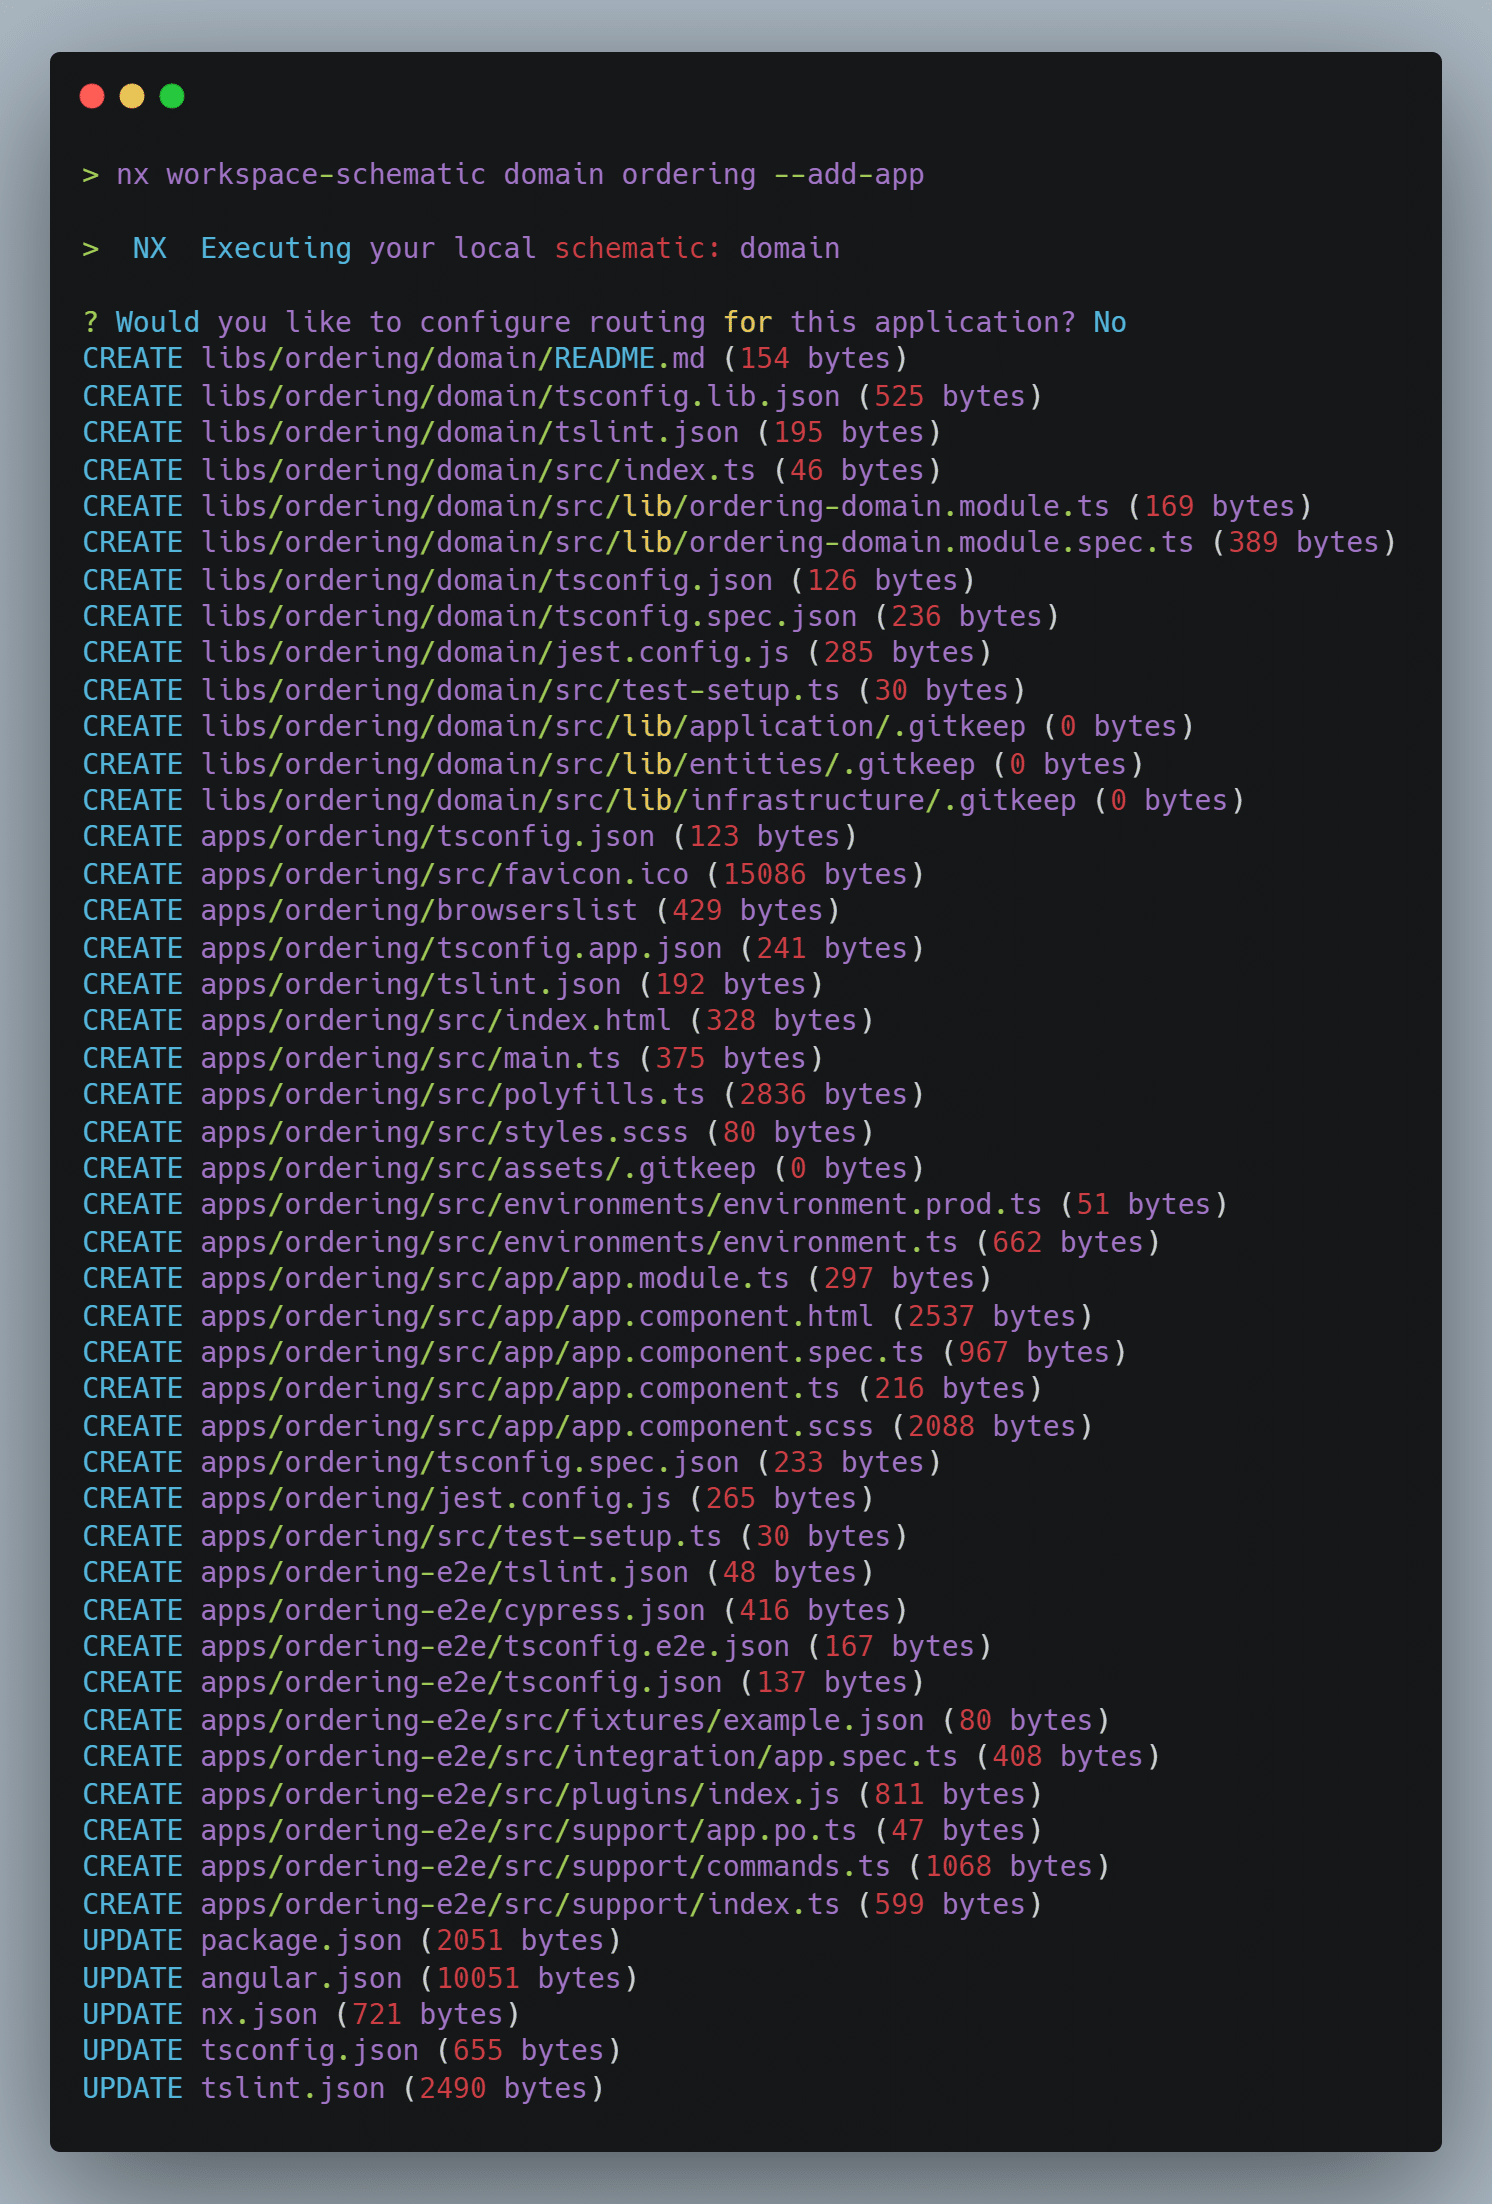
It created the domain library, the application and adds the access rules to the tslint.json.
Conclusion and Outlook
Nx makes creating workspace schematics really easy. We can scaffold them with ng generate and execute them with nx workspace-schematic.
For defining parameters, we modify the schema.json. To access them in a typed way, we should generate an interface out of it.
The automation of our repeating tasks is accomplished by rules which are just functions. Besides using existing rules like externalSchematic we can also write our own ones.
Besides this, schematics can also modify existing files and generate new ones by copying templates. The latter ones can contain placeholders which are populated with concrete values. The next article of this series will show more about this possibility.