

This article is part of an series:
- Part 1: A possible future without Angular Modules
- Part 2: Higher order and dynamic Components (this one)
TLDR; With Ivy's private APIs, we can dynamically create components. The example here demonstrates this by creating a routed component on the fly:
const routes: Routes = [
  {
    path: 'comic/:comicId',
    component: withRoute(ComicComponent)
  }
];
As an software architect, I'm constantly in search for ways to improve my applications's structures. The goal is nearly always to provide robust and more sustainable solutions. This is also a big topic in my advanced Enterprise Angular workshop.
Ivy provides some awesome features helping to reach these goals. In this article series, I show them in the context of several examples. I look behind the curtain of Angular's new view engine which helps us to understand better what's going on and what the future of Angular might look like.
This article shows how to use Ivy to generate components on the fly and how to create a higher order components. You can find the source code of the example used here in my GitHub account.
Big thanks, to Angular's Alex Rickabaugh for reviewing this article and for giving me some hints about Ivy.
DISCLAIMER: The examples here are an experimentshowing how Ivy works under the covers by leveraging its private APIs. Hence, it's not production ready and it does not reflect the Angular teams's official vision. Nethertheless, it's useful to learn how Ivy works and what features we might get via the official public APIs after Ivy landed.
Currently, the Angular team's goal is to make sure, there are no breaking changes after migrating to Ivy. After this, they will introduce new features based on Ivy step by step.
Example
The example I use here is a simple comic browser:

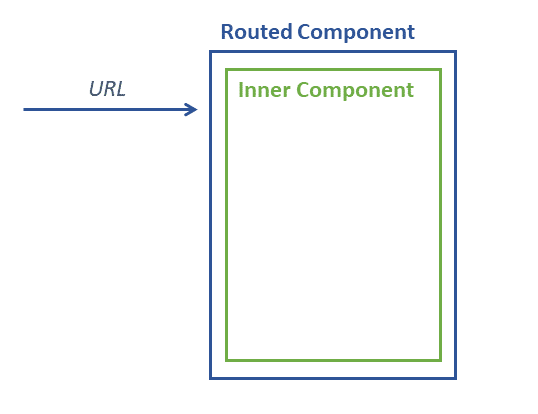
After selecting a comic from the list, the router puts the respective comicId into the URL and activates a RoutedComicComponent:
@Component({
  selector: 'app-routed-comic',
  templateUrl: './routed-comic.component.html'
})
export class RoutedComicComponent implements OnInit {

  constructor(private route: ActivatedRoute) { }

  params: any = {};

  ngOnInit() {
    this.route.params.subscribe(params => {
      this.params = params;
    });
  }

}
This component reads the parameters from the URL. The template binds them to the ComicComponent which displays the comic in question:
<app-comic [comicId]="params.comicId"></app-comic>
To put it in a nutshell, we have a routed component which just delegates the routing parameters to an inner one, e. g. the app-comic:
Goal
In our example, the RoutedComicComponent can be considered glue code. It's just here to read and delegate the parameters.
Of course, we could put this logic into the ComicComponent but then, this component would have to know the router including the current very specific routing configuration. In turn, it would become less reusable.
On the other side, the RoutedComicComponent would look very similar for other components. Only its encapsulated component needed to be exchanged. Hence, we can create this component on the fly for different encapsulated components.
As the next sections show, this task is quite easy with Ivy.
Inspecting the result of the Ivy compiler
Before we go on, let's find out how Ivy transforms our RoutedComicComponent during the compilation. To make the compiled code more readable, we should switch to ES2015 if this is not already the case. For this, make sure the target property in your tsconfig.jsonpoints to ES2015:
{
  [...]
  "compilerOptions": {
    [...]
    "target": "es2015",
    [...]
  },
  [...]
}
Also, make sure you are using Ivy. In this case, we need the following angularCompilerOptions node in our tsconfig.app.json:
{
  "extends": "./tsconfig.json",
  "compilerOptions": {
    [...]
  },
  "include": [
    [...]
  ],
  "exclude": [
    [...]
  ],
  "angularCompilerOptions": {
    "enableIvy": true
  }
}
After running ng build --aot we should find the downleveled version of our RoutedComicComponentwithin the main bundle in the dist folder.
class RoutedComicComponent {
    constructor(route) {
        this.route = route;
        this.params = {};
    }
    ngOnInit() {
        this.route.params.subscribe(params => {
            this.params = params;
        });
    }
}
const _c0 = [3, "comicId"];

RoutedComicComponent.ngComponentDef = ɵɵdefineComponent({
    type: RoutedComicComponent,
    selectors: [["app-routed-comic"]],
    factory: function RoutedComicComponent_Factory(t) {
        return new (t || RoutedComicComponent)(ɵɵdirectiveInject(ActivatedRoute));
    },
    consts: 1,
    vars: 1,
    template: function RoutedComicComponent_Template(rf, ctx) {
        if (rf & 1) {
            ɵɵelement(0, "app-comic", _c0);
        } if (rf & 2) {
            ɵɵproperty("comicId", ctx.params.comicId);
        }
    },
    directives: [ComicComponent],
    styles: ["..."]
});
I've formatted this listing a bit and removed the webpack-based imports to make it more readable. As you can see, Ivy adds a static ngComponentDef property during compilation. It contains all the details, Angular needs to execute the component at runtime. Most of them are self explaining:
-
type: The component's type -
selectors: Each defined selector is an array within this array here. -
factory: Function creating the component. Please note that it also takes care of injecting the necessary dependencies.The passed parameter
tis only used for sub-classing. If a componentMyCompinheritsBaseComp,MyComp's factory has to delegate toBaseComp's one. However, as you want to instantiateMyCompin this case,MyCompis passed as the parametert. This way,MyCompcan also inherit the injections set up forBaseComp. -
const: The count of nodes, local refs, and pipes in the template. This is used to initial an internal array with a proper length. -
vars: The same for the number of bindings. -
template: The compiled version of our HTML template. -
directives: Other directives and components our component can call. Ivy populates this array with entries fromNgModules to be backwards competable. However, as shown in my former post, Ivy doesn't needNgModulesanymore. -
styles: CSS rules
Also note, that the used functions are prefixed with ɵɵwhich shows that we are talking about Ivy's internal and hence not public API. Hence, details can change over time.
Now, let's have a closer look at the template function. It's really nothing more than a JavaScript representation of our template. Instead of exchanging placeholders within HTML (or SVG, etc.), Angular uses this function in order to improve the data binding and rendering performance.
The passed parameter, rf (RenderFlags), denotes the rendering phase. Angular sets the first bit when it creates the component and the second bit when it updates its bindings. Hence, in the former case, the function creates the template's elements while in the latter one, it updates their bindings.
The second parameter, ctx (Context), points to the component instance.
For creating an element, ɵɵelement takes an unique id and the element's name. This ids which are ascending and start at 0 can be used later to reference this element. In our case, this name points to the component with the selector app-comic. The last parameter, _c0, informs ɵɵelement about attributes, properties, etc. The 3 in this array indicates that the next entry is a property we bind to and the following comicId is its name.
For updating this binding, ɵɵproperty takes the property name and its new value. Perhaps you are wondering, how ɵɵproperty knows which element we are referring to. In our case, it's easy as there is only one element.
By default, ɵɵproperty uses the element with the internal id 0. To switch over to another one, Ivy calls ɵɵselect with the respective element id. For instance, to work on the element with the internal id 2, we would use the following code:
ɵɵselect(2);
ɵɵproperty("comicId", ctx.params.comicId);
As we have now the necessary knowledge about Ivy's internals, we case build upon it to dynamically create components like out RoutedComicComponent.
Creating a higher order component/ dynamic component
To dynamically create an Ivy component, we just need a factory function which takes parameters and returns the component. In our case, the only parameter is the Angular component we want to route to. To be more precise, it's the inner component's type, e. g. ComicComponent.
The return value is a dynamic routed component which renders the passed component and delegates all received routing parameters. This make this routed component a higher order component as it is a component parameterized with another one.
Let's say, the factory function is called withRoute. In this case we can use it as follows within our routing configuration:
const routes: Routes = [
  {
    path: 'comic/:comicId',
    component: withRoute(ComicComponent)
  }
];
Because of this, we don't need to handwrite a RoutedComicComponent anymore.
The basic structure of such a function looks like this:
export function withRoute(inner: Type<any>) {

    // Step 1: Create a class on the fly
    class HigherOrderComponent implements OnInit {
      [...]
    }

    // Step 2: Assign ngComponentDef
    HigherOrderComponent.ngComponentDef = ɵɵdefineComponent({
      [...],
      template: function(rf, ctx) {
        // Step 2a: Call the inner component
        [...]
      }
    });

    // Step 3: Return component
    return HigherOrderComponent;
}
Also, at the beginning of this function, we need to get the selector of the passed component so that it can be rendered dynamically later:
// At runtime component will be a ɵComponentType<any> with
// a static ngComponentDef property
const ngComponent = inner as ɵComponentType<any>;

// Step 1: Get needed information from ngComponentDef
const def = ngComponent.ngComponentDef as ɵComponentDef<any>;

// Simplification: We assume a single element name
const elementName = def.selectors[0][0] as string;
The class declared within the function looks like this:
class HigherOrderComponent implements OnInit {

    static ngComponentDef: ɵComponentDef<HigherOrderComponent>;

    params: any = {};

    constructor(private route: ActivatedRoute) {
    }

    ngOnInit() {
        this.route.params.subscribe(params => {
          this.params = params;
        });
    }
}
As you see here, this method only puts the received routing parameters in the property params.
Please note that each call of the function declares a new class. Technically, you have a local variable HigherOrderComponent pointing to a dynamically created class.
The assigned ngComponentDef contains the same information as we've found in the bundle described above:
HigherOrderComponent.ngComponentDef = ɵɵdefineComponent({
    consts: 1,
    vars: 1,
    directives: [
        component
    ],
    changeDetection: ChangeDetectionStrategy.Default,
    factory: () => new HigherOrderComponent(
        ɵɵdirectiveInject(ActivatedRoute)),
    selectors: [[]],
    template: (rf, ctx) => {
        [...]
    },
    type: HigherOrderComponent,
});
To give this component the possibility to render the inner component, the latter one is put into the directives array. However, the real interesting part here is the template function which binds the routing parameters:
template: (rf, ctx) => {

    if (rf & ɵRenderFlags.Create) {
        ɵɵelement(0, elementName);
    }
    if (rf & ɵRenderFlags.Update) {
        for (const prop in ctx.params) {
            const compProp = def.inputs[prop];
            if (compProp) {
                ɵɵproperty(prop, ctx.params[compProp]);
            }
        }
    }
},
Instead of hardcoding the render flags this function uses the ɵRenderFlags enumeration. During the creation phase, it creates an element for the inner component.
During the the update phase, the template function iterates through all received routing parameters and checks if the passed component has inputs with the same name. For this, it looks into the inputs map of its ngComponentDef.
If there is a match, the respective property can be found within this map. In Angular it's usual that inputs have the same name as their properties. In this case the inputs map looks like this:
{
  "comicId": "comicId"
}
However, the Input decorator gives us the possibility to assign a different name to the inputs using a parameter:
@Input('cid') comicId: string;
In this case, the input property would map cid to comicId:
{
  "cid": "comicId"
}
That shows, we are on the safe side when looking the property name up in this map.
After finding a match, the template function updates the respective property using ɵɵproperty.
The result is a function that creates the routed component on the fly. We don't need to handwrite it anymore.
Conclusion
Ivy allows us to dynamically create components on the fly and hence to create higher order components. For this, we just need a class with a proper ngComponentDef property.
To find out how such a ngComponentDef needs to be structured, we can AOT-compile an example and examine the resulting bundles.
While this is really straight forward, please keep in mind that we need to leverage Ivy's private APIs for this. However, enabling such things was a design goal for Ivy and sooner or later the Angular team will (hopefully) add these possibilities to the public API.
Bonus: Compiling at runtime
If performance and bundle sizes do not matter and if you are not able to feel any pain at all, you can also use the Angular compiler at runtime:
For this, you have to import the compiler somewhere in your application, e. g. when bootstrapping:
import '@angular/compiler';
Then, create your component class on the fly, e. g. within an factory function:
@Component({ template: '' })
class HigherOrderComponent { [...] }
Please note, that this Decorator is not used at all. However, we need to use an arbitrary decorator to make TypeScript emit the necessary metadata for dependency.
To get an ngComponentDef, call the compiler:
ɵcompileComponent(HigherOrderComponent, { template: '<b>Hello</b>' });
The second parameter takes the traditional options normally passed to @Component. Obviously, you can create this object dynamically.
On interesting aspect of ɵcompileComponent is that it works asynchronously if it needs to resolve load files like the template or css files. Otherwise it works synchronously. In the first case, you don't get the ngComponentDef property immediately and hence further operations with this component will fail. To prevent this, call ɵresolveComponentResources after calling ɵcompileComponent and await the promise returned.